 Sign in to Mod The Sims
 Edited Wainscot panels textures
 Edited Wainscot panels textures
MTS has all free content, all the time. Donate to help keep it running.
SCREENSHOTS

IndexPicture2.jpg - width=1200 height=768
Edited panels.jpg - width=1039 height=658
UpdatedPanels.jpg - width=1100 height=1021
Texure and channels.jpg - width=800 height=773
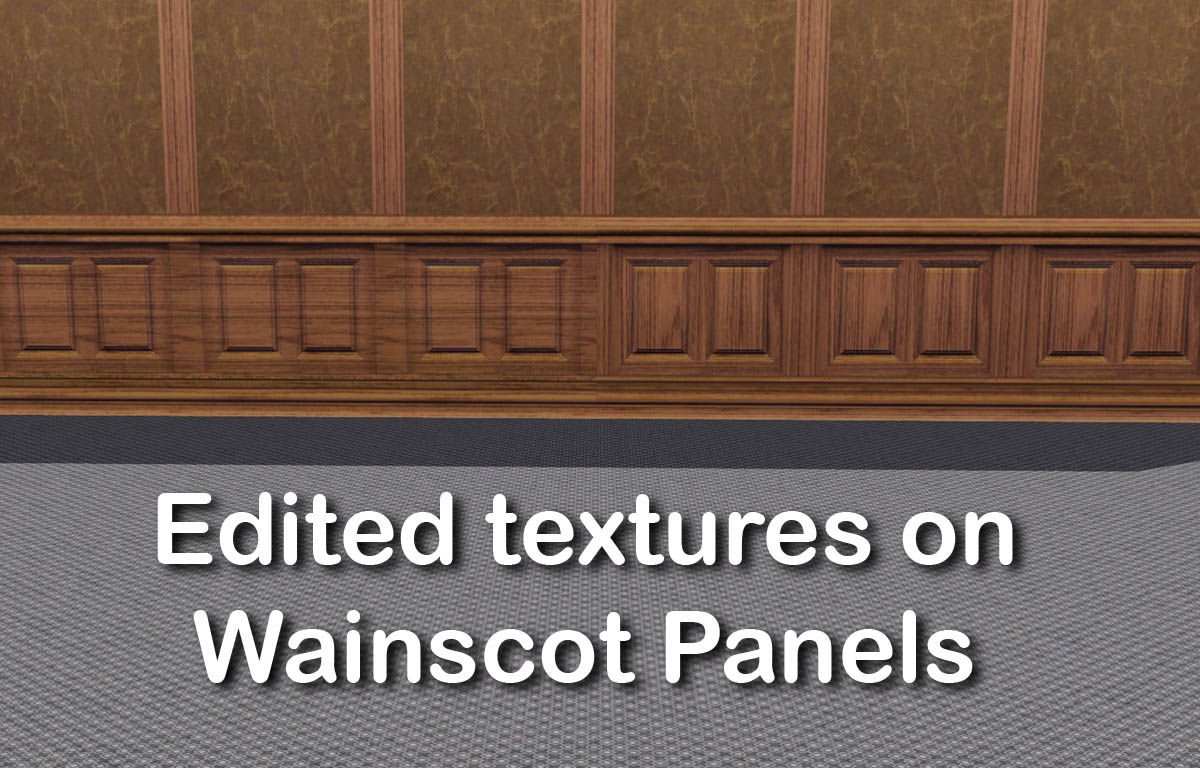
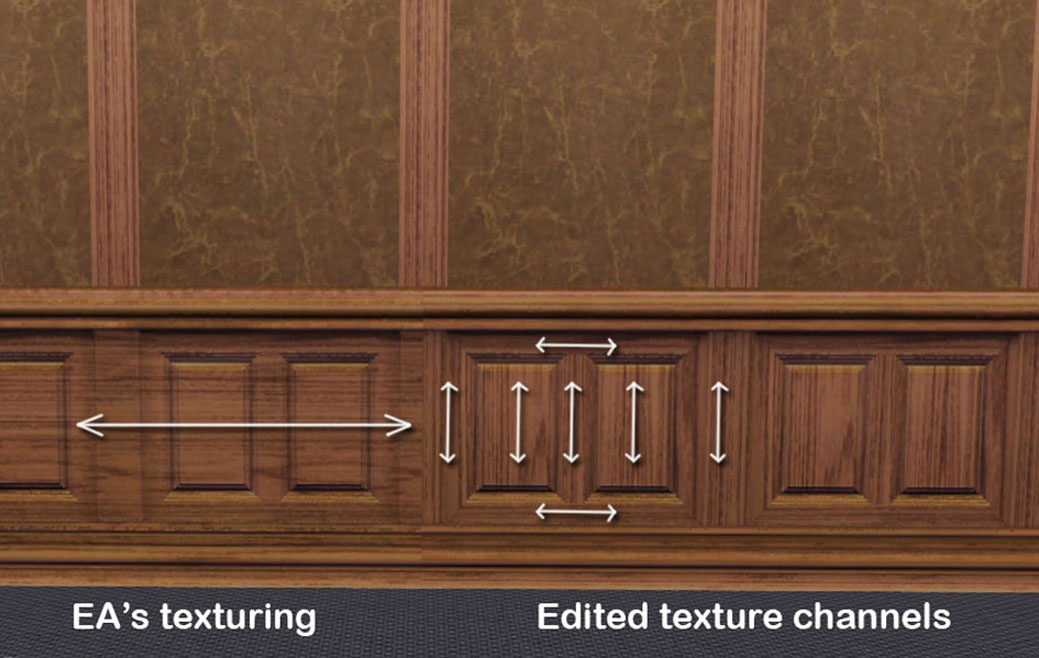
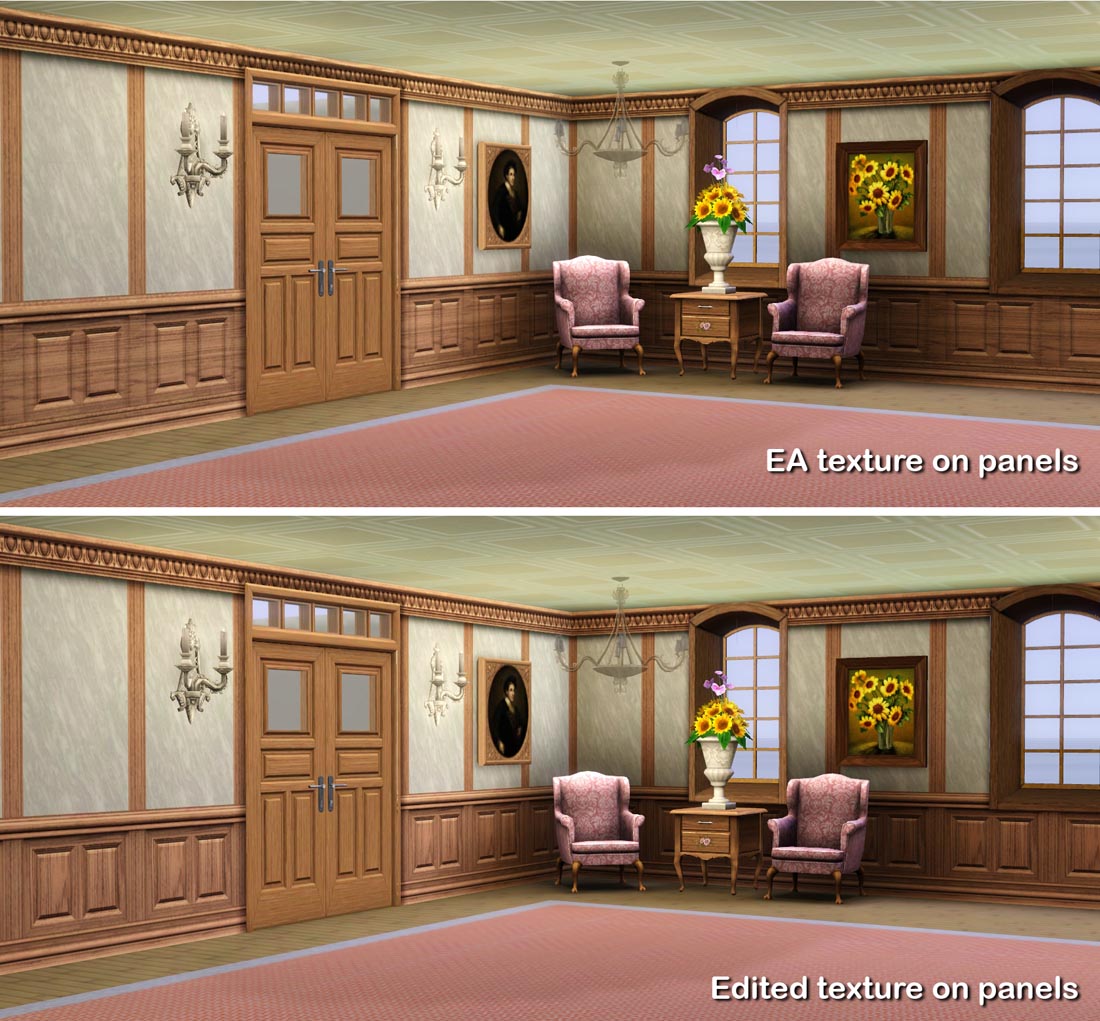
Well, this is perhaps not a big deal but I have always irritated me to the poor texturing of Wainscot panels, which I use quite often. But with the original texture they do not look good. Therefore, I changed the channels to make them look more real and will make the carpenter happy. This is perhaps not so much to worry about but if you are disturbed as me do download.

I changed the two panels,
Wall_Wainscot_2 square and Wall_Wainscot_2Square_2Panel.
In the game there are many variants of these but I only have two in my packages. It is therefore intended that you change the panels with CAST and create the ones you like.
Were you find the panels and the costs
After installation you will find of course the panels with the others in the panel directory.
The names and costs are:
Lisen_Wall_Wainscot_2 square $ 10
Lisen_Wall_Wainscot_2Square_2Panel $ 11
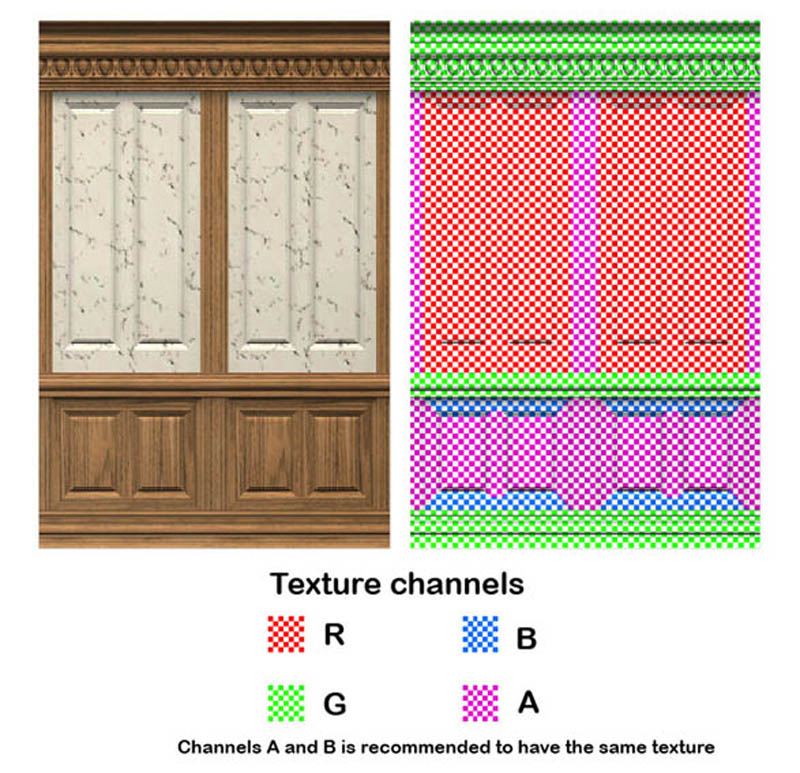
Color channels and texturing
The panels have four channels, se picture. Use the same texture for channels A and B
for the panels to look real.
Additional Credits:
As always I want to thank all the developers of the tools I use and all the helpful people here and there.
I changed the two panels,
Wall_Wainscot_2 square and Wall_Wainscot_2Square_2Panel.
In the game there are many variants of these but I only have two in my packages. It is therefore intended that you change the panels with CAST and create the ones you like.
Were you find the panels and the costs
After installation you will find of course the panels with the others in the panel directory.
The names and costs are:
Lisen_Wall_Wainscot_2 square $ 10
Lisen_Wall_Wainscot_2Square_2Panel $ 11
Color channels and texturing
The panels have four channels, se picture. Use the same texture for channels A and B
for the panels to look real.
Additional Credits:
As always I want to thank all the developers of the tools I use and all the helpful people here and there.
| Filename | Size | Downloads | Date | |||||
|
Lisen_Wall_Wainscot.7z
Size: 105.2 KB · Downloads: 4,274 · 5th Jun 2012 |
105.2 KB | 4,274 | 5th Jun 2012 | |||||
| For a detailed look at individual files, see the Information tab. | ||||||||
Key:
- - File was updated after upload was posted
Install Instructions
Quick Guide:
1. Click the file listed on the Files tab to download the file to your computer.
2. Extract the zip, rar, or 7z file. Now you will have either a .package or a .sims3pack file.
For Package files:
1. Cut and paste the file into your Documents\Electronic Arts\The Sims 3\Mods\Packages folder. If you do not already have this folder, you should read the full guide to Package files first: Sims 3:Installing Package Fileswiki, so you can make sure your game is fully patched and you have the correct Resource.cfg file.
2. Run the game, and find your content where the creator said it would be (build mode, buy mode, Create-a-Sim, etc.).
For Sims3Pack files:
1. Cut and paste it into your Documents\Electronic Arts\The Sims 3\Downloads folder. If you do not have this folder yet, it is recommended that you open the game and then close it again so that this folder will be automatically created. Then you can place the .sims3pack into your Downloads folder.
2. Load the game's Launcher, and click on the Downloads tab. Find the item in the list and tick the box beside it. Then press the Install button below the list.
3. Wait for the installer to load, and it will install the content to the game. You will get a message letting you know when it's done.
4. Run the game, and find your content where the creator said it would be (build mode, buy mode, Create-a-Sim, etc.).
Extracting from RAR, ZIP, or 7z: You will need a special program for this. For Windows, we recommend 7-Zip and for Mac OSX, we recommend Keka. Both are free and safe to use.
Need more help?
If you need more info, see:
- For package files: Sims 3:Installing Package Fileswiki
- For Sims3pack files: Game Help:Installing TS3 Packswiki
Also Thanked - Users who thanked this download also thanked:
About Me
I'm glad if someone enjoy my creations and happy if you use it in your game. You may use it in your uploads but not claim it as your own and no pay please.
Credit is nice but not mandatory.
Credit is nice but not mandatory.