
 Sign in to Mod The Sims
- Site Map >
- Community >
- Sims Discussion >
- Sims 3 >
- Information - Tutorial: post-processing effects for TS3 & TS4 with ReShade 2.0
- Site Map >
- Community >
- Sims Discussion >
- Sims 3 >
- Information - Tutorial: post-processing effects for TS3 & TS4 with ReShade 2.0
 2nd Jul 2016 at 12:02 PM
Last edited by alverdine : 12th Jul 2016 at 5:39 PM.
2nd Jul 2016 at 12:02 PM
Last edited by alverdine : 12th Jul 2016 at 5:39 PM.
Posts: 514
Thanks: 8298 in 57 Posts
The method is the same for all games, just substitute TS3 references.


What is ReShade?
|
ReShade is an advanced, fully generic post-processing injector for games and video software. Imagine your favorite game with ambient occlusion, real depth of field effects, color correction and more … ReShade exposes an automated and generic way to access both frame color and depth information (latter is automatically disabled during multiplayer to prevent exploitation) and all the tools to make it happen. The possibilities are endless! Add advanced depth-edge-detection-driven SMAA anti-aliasing, screen space ambient occlusion, depth of field effects, chromatic aberration, dynamic film grain, automatic saturation and color correction, cross processing, multi-pass blurring … you name it. |
ReShade essentially uses information from your game to calculate and produce a screen overlay of effects (called shaders) that can subtly enhance or completely change the look of your game. Tweak the configuration and settings to your heart’s content, or use a preset.
With post-processing you can:
- use different methods of anti-aliasing
- alter hues, vibrancy and sharpness
- add dynamic depth of field and ambient occlusion
- add lighting effects such as lens flare and bloom
- and much more
Version 2.0 combines all the SweetFX shaders with new and exclusive ones. You can also keep using the game's own anti-aliasing, unless you use a shader dependent on a depth buffer (more on that later). Shaders can be toggled and settings adjusted while in-game, in real time.
Most effects can be used for regular gameplay, others will only benefit taking screenshots or video as they distort the UI too much.
On to the Tutorial
 There seems to be an issue with ReShade currently not working in TS3 on laptops with dedicated NVIDIA graphics cards.
Back up your game’s install folder before starting if you have any concerns!
1. Download ReShade here – get version 2.0 from Alternative Downloads. Unzip the file contents into a folder. Your anti-virus may flag it as malware - you can safely ignore this. Ensure you have DirectX End-User Runtime installed (required).
2. Give ReShade Assistant administrator privileges:
Right-click > ReShade Assistant.exe > Properties > Compatibility > Change settings for all users > Run this program as an administrator > Apply > OK
Launch it. Navigate the interface by clicking the vertical tabs to open up panels. Take a quick look through them then go to the Profiles panel.
3. Create a profile for TS3:
Click + and navigate to the game’s executable, most likely in C:/Program Files x86/Electronic Arts/The Sims 3/Game/Bin. Select TS3W.exe (if you have any issues later on, come back to this step and select TS3.exe instead). It should automatically detect which version of the .dll library files to create, in this case d3d9. Click Confirm. It will add these 2 files to TS3′s Bin folder: d3d9.dll and ReShade.fx. Once the game is run it will add a third, d3d9.log.
Removing a profile from the Assistant will delete these files. You can also delete them manually to remove ReShade.

4. Select the newly created Sims_3 profile and go to the Presets panel.
5. Click + to create a new preset and give it a name without spaces - use underscores.
Toggle the float on top button in the top left corner, this will keep the Assistant at the front of your screen while in-game. The game needs to be running in windowed mode for this to work. Windowed Borderless Gaming is useful and remember to get an FPS limiter since VSync only works in fullscreen.
Select the new preset and run the game normally. Some text should appear in the top left corner at start-up. Load a world to test in.
6. Open the Shaders panel. Scroll this list with the mouse wheel. Clicking the empty area next to the name of a shader will select it and show it’s description in the bottom panel. Clicking on the name will toggle it.
For testing, find HDR. Select it to view the description, then toggle it. Hit Save then Confirm. Text will appear on the screen again, informing you that changes were successful (or not) and the effect will be applied.


7. Now it's time to experiment with things. With HDR selected, open the Shader Settings panel. Input values are listed on the right. Hovering over a value will show information in the bottom panel about what the setting does, its default value, and the valid numerical range. This is also where you can assign a Toggle Key to individual shaders. Set them using virtual key-codes e.g. F1= VK_F1, Shift= VK_SHIFT.
Type in new values, click Save, Confirm, and see what the result is.

8. Take screenshots with the Print Screen key, press F10 to toggle the game’s UI or it will show in screenshots. Images will be saved in the folder where TS3W.exe is. You can change the hot key and image format in the Assistant’s Profile Settings panel.
Important Things to Note:
Depth buffer: shaders dependent on a depth buffer, e.g. Ambient Occlusion, Depth Haze, Depth of Field, etc. all require that in-game anti-aliasing be turned off. Enable some form of AA through your graphics card settings or SMAA/FXAA in ReShade instead.
UI, presets & toggle keys: shaders will also affect the UI, and some (mainly the cinematic ones) make it unreadable. Set up multiple presets - one for gameplay and others for your screenshots. They can be switched while in-game. OR assign individual shaders toggle keys (step 7).
Split Screen: is a shader that splits your screen into a side by side comparison and is really handy.
Performance: impact on performance will vary depending on what shaders you use, how many, and the individual settings. Use an FPS display to monitor this. ReShade has a built in one that can be enabled in the Profile Settings panel.
Tweaking: lots of shaders will not look good in TS3 on their default settings, don’t be afraid to get tweaky.
Sharing is caring: if you create a preset you're proud of, please share it for others to admire and enjoy!
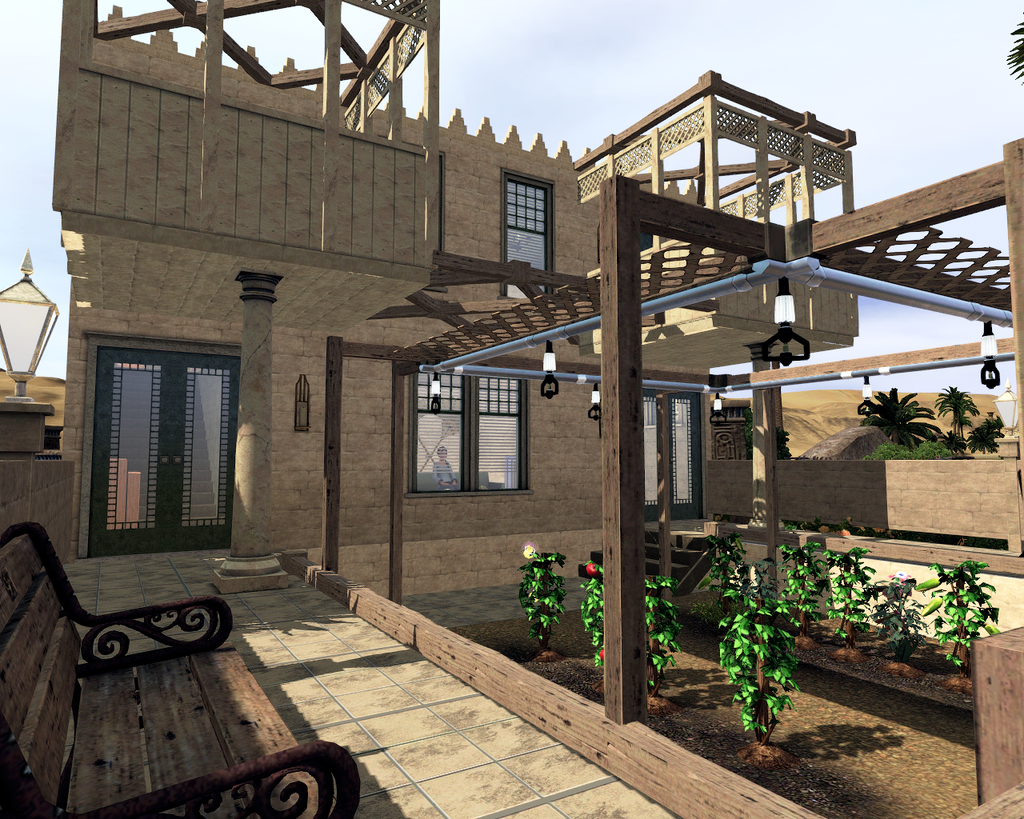
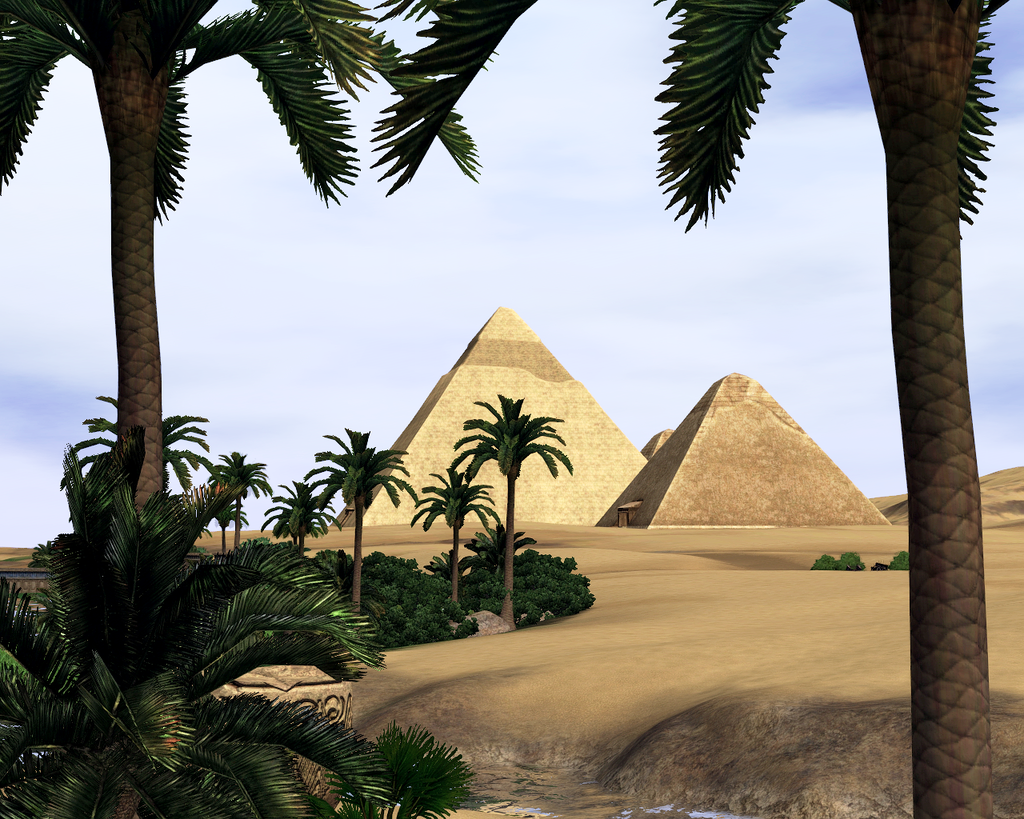
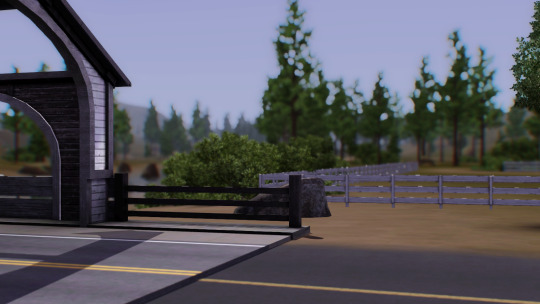
Here’s my game without post-processing:
 2nd Jul 2016 at 12:48 PM
Last edited by Greenplumbbob : 2nd Jul 2016 at 1:01 PM.
2nd Jul 2016 at 12:48 PM
Last edited by Greenplumbbob : 2nd Jul 2016 at 1:01 PM.
Posts: 3,860
Thanks: 8548 in 67 Posts
It's just sad that you can't make pictures with it in-game as I experienced it. But I'll definitely try this out!
Edit: wait that was the sims 4, I actually meant this one: http://brntwaffles.tumblr.com/post/...-full-quality-a
2nd Jul 2016 at 1:13 PM
Posts: 514
Thanks: 8298 in 57 Posts
 ReShade 2.0 also has some neat effects that SweetFX doesn't have - like the depth of field. I fucking luff DOF.
2nd Jul 2016 at 4:15 PM
ReShade 2.0 also has some neat effects that SweetFX doesn't have - like the depth of field. I fucking luff DOF.
2nd Jul 2016 at 4:15 PM
Posts: 1,222
Thanks: 433 in 3 Posts
2nd Jul 2016 at 4:16 PM
Posts: 514
Thanks: 8298 in 57 Posts
| How many frames does AO cost? I have pretty good computer, but if I can't run TS3 at 60fps like I do now then fancy graphic effects are pointless. |
AO requires a lot from your system. I went from about 40-60fps down to anywhere from 28-55fps depending on how much scenery was rendering, that was with a bunch of other effects enabled though. There are also different methods of ambient occlusion to choose from and then varying settings for those that will all change the impact on performance.
AO isn't the only thing it offers though. A little bit of sharpening is nice for a HQ effect, boosting certain colours or desaturaing some is handy too. You could change the hue of the game or fiddle with brightness and contrast - those things don't really strain your system.
Another advantage is actually gaining frames by disabling in-game edge smoothing (if it's currently set at the highest) and using your graphics card's AA combined with SMAA in ReShade. The result is not as good as the game's highest setting but it is faster.
| Those are pretty pictures but I wouldn't want to play my game like that. I'd rather be able to see everything than to have the foreground sharp and the background blurry like that. |
Agreed, those effects are some I wouldn't play with constantly, and only use for pictures. It's as simple as pressing a key to toggle the effect on and off instantly. But the fact that it's possible is pretty amazing.
2nd Jul 2016 at 4:35 PM
Posts: 3,860
Thanks: 8548 in 67 Posts
But I do agree that I didn't really like some options in there as well. Like, the hardness option tht was turned on. I actually ended up tweaking the mod that was already made for me. >-< So I bet it's really useful for people who wants to tweak their own 'sweetFX' ^-^
2nd Jul 2016 at 4:46 PM
Posts: 3
 2nd Jul 2016 at 5:03 PM
Last edited by alverdine : 2nd Jul 2016 at 5:19 PM.
2nd Jul 2016 at 5:03 PM
Last edited by alverdine : 2nd Jul 2016 at 5:19 PM.
Posts: 514
Thanks: 8298 in 57 Posts
You'll need to delete the three files that were added to your TS3 install folder and that should stop your game from crashing.
d3d9.dll
d3d9.log
ReShade.fx
I'm really not sure what's causing the incompatibility with some people. Would you mind taking a screenshot of all the contents of your C:/Program Files x86/Electronic Arts\The Sims 3\Game\Bin folder and posting it if it's not too much trouble? Also what patch level and operating system are you on? Windoze 10 has beefed up security measures that requires anything that makes changes to the Program Files folders require Administrator privileges.
2nd Jul 2016 at 5:21 PM
Posts: 514
Thanks: 8298 in 57 Posts
No crashing for you, everything working alright?
2nd Jul 2016 at 6:37 PM
Posts: 1,972
| Those are pretty pictures but I wouldn't want to play my game like that. I'd rather be able to see everything than to have the foreground sharp and the background blurry like that. |
That corresponds to a choice in photography IRL. Given enough light and/or a long enough exposure, depth of field is terrific (i.e. everything can be in focus.) Other way, you can soften up the background.
2nd Jul 2016 at 8:05 PM
Posts: 3,351
Thanks: 296 in 4 Posts
|
Lol rub it in why don't ya. Which method/settings are you using? No crashing for you, everything working alright? |
Well I actually left it off, it causes a weird fuzziness and transparency issue with the UI. Instead I put my focus of changing game colours and sharpness. I didn't think TS3 could have some-what believe colour palette before.
A choice profound is bittersweet, no one hears Cassandra Goth cry
3rd Jul 2016 at 12:42 AM
Posts: 514
Thanks: 8298 in 57 Posts
If ReShade is crashingwhile trying to add a profile, you need to grant it permanent administrator privileges.
Right-click > ReShade Assistant.exe > Properties > Compatibility > Change settings for all users > Run this program as an administrator > Apply > OK
Windows 10 doesn’t like anything in the Program Files folders to be modified without permission.
I forgot to mention it because all my games are installed in (C:) GAMES so there were no issues.
If adding a profile still doesn’t work, try using the TS3.exe instead of TS3W.exe
Not sure what the difference is, maybe something to do with Origin but someone told me that worked.
3rd Jul 2016 at 1:14 AM
Posts: 514
Thanks: 8298 in 57 Posts
The AO options seem pretty hard to get right. Lots of them add unnecessary shadows around foliage. It requires lots of tweaking and even so I still haven't gotten it to a point I'm happy with.
Those photos look amazing! Bumping up the sharpness a tiny bit really does wonders.
@nitromon
Yep! It's not a good effect during regular gameplay though because it makes the UI too blurry in areas. You could try lowering the amount of blur and distance from the camera it starts at but there will always be some blur over the UI.
Here are some DOF images from joanschnitzel
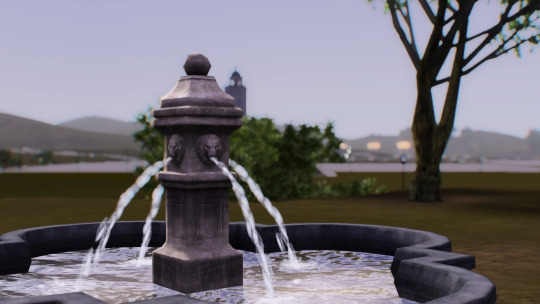
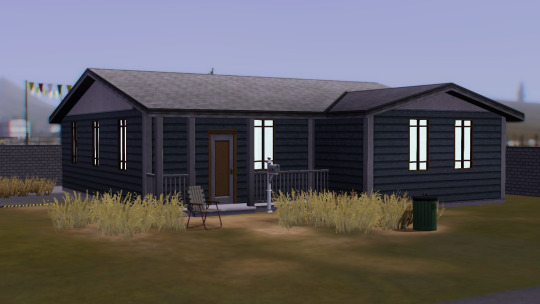
And a few images showing subtle changes to sharpness and curves. If you struggle to see a difference here, click on one then switch back and forth between images in Flickr, you'll definitely see it then.


 3rd Jul 2016 at 3:49 AM
Posts: 514
Thanks: 8298 in 57 Posts
Try the method from post #16, see if that helps with crashing.
3rd Jul 2016 at 10:48 AM
Posts: 36
 3rd Jul 2016 at 12:07 PM
Posts: 1,889
Thanks: 686 in 10 Posts
3rd Jul 2016 at 2:37 PM
Posts: 514
Thanks: 8298 in 57 Posts
| That's awesome! Just wow! Do you mind creating a tutorial for ts4? |
Just follow this tutorial but substitute TS4 references for TS3. It's the same process for all games.
| DOF messes with the UI in all possible ways, but I will still use it for screenshots. Thank you for this tutorial! |
I knooow, it's a shame. It would be nice to have it at a really low setting far off in the distance for regular gameplay, like TS4.
Or I wish that TS3 had 'masked' it's UI. In other games post-processing effects don't affect the UI because they were set up to accommodate them, not so with TS3 unfortunately.
3rd Jul 2016 at 3:02 PM
Posts: 3,860
Thanks: 8548 in 67 Posts
| TS3 is odd game in terms of visuals. Plastic clothes, too much blur, over-saturation. It's one of very few modern AAA titles that don't even have post-processing effects, with exception of blind-me bloom though. While ReShade and SweetFX are nice, they are not really proper substitues for lack of native effects. |
I know the sims 4 has this blur, but the sims 3 is indeed weird when it comes to it's in-game lighting and their specular settings. But I guess the issue here is that if they did add this effect to it, we still have the issue with the fact that back in 2009, a lot of computers couldn't really handle the sims 3 (unless someone owned this really expensive computer). I mean usually when i play a game, especially that's from an AAA titles, I had to turn off all those blur kind of effects because it was causing my game to lack. And imagine that back in 2009 when most computer were able to just run the sims 3? Having this open world, with sims all running around, lots that had meshes and all in them too (while in normal AAA titles, there would probably be just props and maybe 2 houses in the world being set up like the sims 3 does). I mean, when I was playing Assassin's creed Brotherhood, when the city was crowed my computer was rendering less Frames than if I would just walk in the middle of nowhere. So I can understand why they didn't add it in there. Though say the sims 3 would be made in this year instead of back in 2009, it probably would have had these effects.
3rd Jul 2016 at 3:25 PM
Posts: 3,860
Thanks: 8548 in 67 Posts
| If '2009" release date was EA's reason for not implementing these effects, EA could have recompiled TS3 shaders with new effects later on as by time ITF came out most computers could handle them. (As well 64-bit ... F you again EA), but they chose not too. |
That's true! And I guess they could add these effects with the Enabled advanced rendering (like the options would be faded out when it's unchecked, since people will choose for this option if they know their computer can handle it) I mean that would have made things better for everyone. But I guess it's just the way the game was build that might have made it harder to do, yet if people can accomplish doing what @alverdine has done, I guess it wouldn't have been too hard.
3rd Jul 2016 at 6:36 PM
Posts: 9
I followed your tutorial to the letter, but when I try to start my game, nothing happens.
So I checked the task manager and the sims 3 stays stuck at 13mb.
I've used the ts3w.exe & ts3.exe and both have the same issue.
The reshader doesn't crash, my game just won't start up. I'm not sure if I'm supposed to do something extra?
3rd Jul 2016 at 6:49 PM
Posts: 514
Thanks: 8298 in 57 Posts
Sorry you're having issues with it. A few other people have been reporting the same problem: Sims 3 running in the task manager but not actually opening.
I really don't know why it works for some people and not others. I compared my operating system, patch level, directX version, etc. against another person who had the issue and everything was the same.
How much RAM do you have, and how much is already in use when trying to run TS3?
3rd Jul 2016 at 7:29 PM
Posts: 9
My specs are (if that is needed):
Gefore GT 740m
Intel Core i7 - 3630QM CPU @2.40GHZ
8 GB RAM
Microsoft Windows 10
If i check, only 40% of my memory is used before I start up the game.
I have used ENB's for other games before and they slow my pc down, but the games still start and are playable.
I'm just wondering if there is a conflict with other files, like a hq mod or something? But that only affects the graphic rules file, so i really don't know.
Anyway, thank you for taking your time to reply and help!
3rd Jul 2016 at 7:54 PM
Posts: 514
Thanks: 8298 in 57 Posts
Alright so RAM doesn't seem to be the cause. I'm pretty sure ReShade doesn't modify any original TS3 files, only adds it's own files that hook into the game while they're in the install directory.
I've started a thread on the ReShade forum asking about this issue. Until someone with more technical knowledge can help troubleshoot it I'm afraid there's nothing else I can do to help
sorry! For now just delete d3d9.dll, d3d9.log, and ReShade.fx from the bin.If you're reheeeally determined to try post-processing, you could try using one of the older versions from that website. They all have different applications for tweaking settings though so you'll need to find tutorials on how to use those or figure them out yourself.
3rd Jul 2016 at 10:26 PM
Posts: 5
Who Posted
|
|