Page 1 of 3
|
Page 1 of 3
|
MilkShape GEOM plugins, V0.16 (02-Dec-2009)
2 Attachment(s)
The attached package is a pair of MilkShape plugins for working with Sims 3 body meshes. This version requires MilkShape 1.8.5, due to TS3 specific requirements. You can get the update directly from the publisher at http://chumbalum.swissquake.ch/index.html. Note that while the update is free to registered users, MilkShape 3D is not a free package.
The plugins also require the "Visual Studio 2008 Runtime" package be installed. This is free from MicroSoft, and can be found here. With these two prerequisites, you can download and use the plugins freely, provided you adhere to the licensing terms, which no longer restrict what you make with the plugins (included in the package). They are much like UniMesh for TS2, although they are fundamentally different because TS3 is fundamentally different. Included in the archive is a new plugin, the CCTool, which allows editing some new TS3 specific values, the VertexID and the TagVal. <* Wes *> V0.16 fixes the exporter losing the 4th weight. |
I have it all but now I have to work out how to use it. I'd be really interested in a tutorial, I never used milkshape before.
|
I plan to move this tutorial here to MTS soon. It is a basic how-to-get-started project, I think just what you need.
<* Wes *> |
Wes, are you the one who's also working on the Maya Plug in? Do you have any rough idea when that might come out to public? Thanks
 |
I haven't had a lot of feedback from the testers, except one. And none recent.
I do have a set of working Maya plugins, although I don't have copies of every version, because I don't have the libraries for all. These are .mll plugins, not .mel scripts, a file translator that does read and write. I have Maya 7.0, 8.5, 2008 32-bit and 2009 32-bit and 64-bit versions. Given the way Maya is designed, they all compile from one source, and should be identically functional, but you have to have the right version. Barring a major bug in the GEOM plugins showing up (requiring immediate attention), I intend to stay focussed on finishing an object mesh (.model, .lod) plugin next. I have not finished a proof-of-concept version here, but once I have gotten to the point where I can make a new object mesh, it should not take long to finish from there. |
Wow! That's great!!
Well I have a lot of patience, hard to believe that modding for the Sims 3 is moving along so quickly. Thanks for the response Wes, I'm sure once you're finished with the plugin it will work like a charm! |
Wes - I would like to create a boat from a milkshape file i have made - i truley have no clue how to do this and i am wondering if i post the file if you wouldnt mind making it
|
I absolutely do not make things on request.
These plugins do not handle anything but Sims meshes. Objects have a different format and will require a different set of tools, and they are not ready yet. <* Wes *> |
Thanks for the responce!
sorry for requesting new to this stuff |
1 Attachment(s)
First, I'd like to say "thank you!!!" to you, Wes. Much appreciated.
But, I'm a bit in need. The window of Sims3 Extra Data Tool is odd. Help. |
Tamo, in my milkshape the right(<-) one is Save, and the left one(->) is Cancel.
|
Nandonalt, Thanks. You saved me.
So I found a screenshot of the window at hair basic tutorial. I didn't notice that tutorial has been updated. Anyway, thanks. |
a small problem! the microsoft's website don't open in my firefox, IE, google chrome, opera...
I really need that Visual Studio 2008 Runtime! hi nandonalt! its me lukas-couto (kachusims)  |
im almost positive that i downloaded the right milkshape program from the chumbalum website, but im still unsure with which to download from the microsoft website :/
could you please send me the exact link to the Visual Studio 2008 Runtime plugin i need to download? |
|
Hi Wes,
The hair meshes imported with the tool don't seem to have morphs for all the body sizes. This means long hair will clip into fatter or musclier sims. Wether this problem is because of exporting from Delphy's CTU or because of this tool I don't know, but I thought I'd report the problem. Thanks for the fantastic tool, having heaps of fun with it. |
I didn't think the hair had any morphs. But I haven't checked them all.
<* Wes *> |
Hi Wes,
I think that just like with Sims 2 pregnant meshes, there may be some in-between morph meshes needed for the game to calculate the position of the hair for fatter sims or sims with whider heads. I don't think it lies within just the vertex assignments... I don't have a way to find out and it's just a theory, but if it's the case, we'd need to make - 4 lod meshes - several morphs Hehehe that would be some work.*cough* Peggy would never bother to do*cough* Any way to check? For an amateur? Thanks |
For all of the body meshes, the morphs share the same group value as the "base" meshes. Someone else (Karybdis) told me that the group was a hash of the directory name (from the developer files at EA) but reversing a hash is difficult, and not needed.
The way to check would be to use Postal (which has GEOM preview) or S3PE and look in the FullBuild0.package and see if any of the original hair files have other GEOMs with the same group number, but a different instance value. If so, morph files carry the "type" value of 3 (type was a misnomer of mine, but it is good enough a term). Adding morphs to packages not designed for them is beyond my knowledge level at this time. The morphs for body meshes are referenced by a VPXY file, but I haven;t researched that any deeper. I don't know that a better job of bone assignments might not be able to be done on the longer hair. The few I have looked at from modders generally just block assigned the longer parts to b__Spine2__, some with little or no multiple assignments. While good assignments take time, there are lots of other bones, some that seem to be adjusted by the sliders, like the right and left breasts. If you're up for a challenge, the meshes are fully animatable, so you can import the hair and a top/body mesh and go into ANIM mode in MilkShape and see roughly how the hair will animate in the game when the head and body are moved. You just have to remove the extra group(s) before exporting your reweighted mesh. <* Wes *> |
Hi Wes,
Thanks for the explanation! When meshing body and hair meshes I always use the animation preview in Milkshape. Sadly, the hair does not seem to have a bone to be assigned to that will move the hair with the fat slider. I can check again, but I don't think it's in there... that's why I thought it could be morphs.I'll try and see if I can find proof for hair having morphs. I will also try and see if I have really checked all the bones for longer hair, that could move with fatness.But, I'm not too hopeful, as hair doesn't move with head shape either, and there's no bone for that either... Maybe I can find evidence for moprhs and maybe the new challange will be to get those working. I'm very happy with your tools and your help! Thank you. I'll report back |
1 Attachment(s)
Sorry to be such a noob at this, but I was trying to modify the long fitted gloves mesh to create longer nails for my sims, and it seems that every time I import the mesh geom (or any mesh geom, for that matter) I get the "Unable to located bone file. Default skeleton used" pop up--which I heard was normal (?)
So I click okay, then I get a big ball of scribbles for a mesh =/ I'm sure I missed a step somewhere |
It is the Joint Size in preferences... those blue lines are a huge rendition of the joints. The default when installed uses a scale that is way to big for Sims (2 or 3) work. Set it to about 0.012 (less or more to your preference).
You can also make the skeleton invisible by unchecking the "show skeleton" box on the joints panel. While the default skeleton is OK to use for an adult, it is way off the mark for teen and childrens meshes. What was missing was the matching .skcon for your mesh, it should be extracted also, when it is present, the plugin resets the joint positions to the exact values in the file. <* Wes *> |
Would you look at that, it works now
Thanks Wes! |
|
help me!!!
MilkShape GEOM plugins 0.1.4 can not save the mesh was not msS3Objexp.dll file. Where do I need to save the file msS3Objexp.dll? I'm sorry, but as [email protected] Would you like to send?
This is Korea. Please. |
I extracted all files to MilkShape 3D 1.8.5 folder but still it doesn't show up on File > New > Import/Export options.
I'm using MilkShape 1.8.5 Beta, trial 30-period |
Did you check that the Visual Studio 2008 Runtime package is installed? It is required (and free from Microsoft).
<* Wes *> |
Ops, my mistake, sorry.
Thanks. |
Which one Visual Studio 2008 I have to download?
|
welding verts
You can no longer use Milkshapes welding tool with these plugins.
It will double up(or more) the ammount of vertices, really strange. I had a mesh of 1350 vertices and 2050 faces and welded a few seams to reduce the ammount of verts. Those verts all have identical positions on the uvmap so no harm will be done. After exporting and reimporting i end up with 5400 vertices and 2050 faces.. Any idea how to solve that? |
Perhaps the UV positions are not as identical as you think. .obj files are laid out differently from the way the game requires vertices to be laid out. You cannot share vertices in this game between faces if they do not share identical UV locations.
The vertex splits it makes are those that are needed, using the same code I used for Sims 2 meshes, with 4 years worth of testing behind it. |
Quote: Originally posted by WesHowe
So, the only way around this is not to use many seams? |
If focusing on raw vertex counts seems like an important item to you, yes.
However, you should look at the way the EA-made TS3 game meshes are constructed. You will not import any that have UV seams without duplicated vertices. That's because the file format does not allow for that... UV coordinates are associated with vertices, following a one-to-one mapping (along with normals, assignmanets, weights and tangent normals). Many modelling programs associate UV coordinates and normals with polygons as separate pooled items. That yields lower vertex counts, but that requires three indices per polygon point instead of one. It is, in the end, a design tradeoff. More of this, or more of that. In the end, if your mesh is more complex, it takes more resources to render. Base didn't say what kind of mesh they were working on, 2050 polys is not a lot for a TS3 mesh. If you want to reduce the impact your mesh has, you will need to reduce the poly count. You can weld vertices all day long, and the exporter will keep splitting them at the seams. To not do so will yield broken meshes in the game. I looked for an example picture, this one is from an object mesh, but it shows what happens when the UV map isn't split properly at the seams:  This is from the post at http://modthesims.info/showthread.p...765#post2748765. |
I can't find Q-mesh in the program, please help!
 |
If you installed the plugins into the MilkShape program directory, and it doesn't show up under the Import or Export menu, then you don't have the Visual Studio 2008 Runtime package installed.
|
Thanks for reply!
I installed Visual Studio 2008 Runtime but I think is not the right one...  |
You can test it out with with a simple mesh split up in 2 seperate halves.
Uv map those halves on the uvmap within the same region. You now should be able to weld the duplicate verts on the seam and export them without any problems. Exporting it in unimesh, wavefront, 3ds or watever plugin is used will give no problems only with the GEOM plugin i end up with 4 times(exact) as many vertices after reimporting. Also giving vertices on the uvmap(UV coordinates) the exact same position be easy as Milkshape has a auto snap fuction build in. Your picture does indeed display how it should look after welding parts that are seperated on the uvmap and that would you expect with these plugins also, but instead they generate new vertices. It wouldn't be a problem if it would generate extra verts for the seams but it gives you back 4 times the verts of the whole mesh. Maybe there is a diference between the object importer and GEOM importer? Another thing i want to mention is that you can not duplicate parts of a mesh and say for instance mirror them without remapping them on the uvmap. It will screw up the rendering/shadow ingame.... Thanks for wat you have done sofar Wes!! If it wasn't for you we wouldn't be meshing arround at all....  |
I would like to see the exported mesh. I can easily reimport it, and I have more tools to disassemble it and count the vertices and so on than just the importer. Then I will be able to tell you exactly what is happening to it.
<* Wes *> |
2 Attachment(s)
Were can i send it to?
I am not uploading it here Edit, Ill try to be a bit more specific bout the issue i am having. I made some tootsies from scratch, and they look wonderfull. The whole mesh, 2 feet with toes have 1320 vertices and 2092 faces But somehow i have a seam when ingame.(see 1st screenshot) Things i already have done trying to fix this. *Checked the boneassignements, they are identical. *Realligned the normals *uvmap the parts seperate and uvmap them with identical uvcoordinates Now i found out that if i weld the verts on the seam(resulting in a mesh with 1289 vertices and 2092 faces within Milkshape) the problem on the seam gets fixed but when i export the mesh, the plugins generate 4 times the ammount of vertices. So the exported mesh contains 5668 vertices and 2092, but all those extra vertices will then again screw up the normals(screenshot 2) |
You changed names on me. I know who you are.
You did a nice job on these, and are almost finished. Good work. To summarize here for others, I got the files from Base1980. As he recapped in his email to me, and from what I could determine here, the issue with a large number of added vertices cannot be replicated, I think it may have been something like a hidden group or something when he was checking. So I checked the feet over, in game and in other tools. There is some extra coloration issue on the inside of the ankles which appears to be related to a couple of UV coordinates being uneven. Otherwise, the only issue I spotted is that the ankle and leg do not match, they have a gap. It is not weights, because I looked at the weights, and I they are identical to the game on the top row, which is the only one that has to match perfectly. The gap does not change during animation, it is always the same size. I checked the ankles against the originals, and the positions are perfect. Finally, I thought to check the VertexID values, yours are all zeroed out, lost in you OBJ import/export work. The VertexIDs are used as part of the mechanism that makes the sliders work. I don't think that all of the VertexIDs are completely necessary, especially when you added vertices. But it appears that at least the top row must be the same as the game for the gap to disappear. Some people have just duplicated the closest VertexID in order to accomodate their extra vertices. I added the VertexIDs for just a couple of the vertices and nearly fixed all the gap. I learned a lot chasing this down. VertexIDs are duplicated on duplicated vertices, for one. The vertex on the inner ankle, where the UV seam is at, is, by necessity duplicated, and both copies carry the same ID number (which is different for each foot). The presence of these values appears to be critical for final mesh sizing, again probably a part of the slider mechanism... without VertexIDs, positioning is being done on the bottom (which has them) that is not being duplicated on the feet. I know you said you have issues with the Extra Data Tool there, this is probably the same, long standing conflict between OpenGL and Windows on child windows, the same issue that has plagued the BoneTool. Most people seem to have gotten around that by using the Mesa DLLs (software OpenGL drivers) available at Chumbalum Software. I know of no alternatives to the Extra Data Tool other than Hex Editing to fix this, but I am pretty confident from just adding a few that by adding the proper VertexIDs on the top row (study the values used on the original by matching position) and perhaps a few tweaks on the UV mapping (and maybe not needed, but there are a few stretch points) you will be good to go on these feet. <* Wes *> |
Quote: Originally posted by WesHowe
If you take the first file, were the seam is half way on top of the foot and weld one vertice on that seam the plugin then will generate all the duplicate verts on export. That first file still has all original vertex IDs till the seam.....and were the gap is at.(screenshots) You use the extra data tool to add the VertexIDs but is there a tutorial or a few lines on how to do so? I hope i get the tool working first though... From every mesh we still learn i guess. :D Altough it was frustrating i now know how to weld seams(and match the uvcoordinates from the 2 parts) and fix the mesh with the tile texture mapper. You are right about the uvmap, i might finetune it when done but then again...not one user of the feet will prolly ever notice. Thank you for clearing things up!! Edit, Installed the mesa GL drivers but the tool keeps freezing. I can add values and such and commit them but i can not exit the program. It should exit when clicking commit? You have a screenshot on how the window should look like? I have the feeling mine doesn't display all buttons. |
1 Attachment(s)
Ah, the old button issue. That has something to do with the DPI setting, I think, as it seems to bite the EU people more than the US.
You should be able to just see the tops of the buttons, they are "Save All" and "Cancel". The "TagVal" values are used for shading on hair meshes... not needed for clothes and body parts. |
yup, cant see the bottom ones.
Not even a glimp.. I can close it now using the TAB key to select cancel. How i find the settings from the originals? If i select a vert that is already assigned it shows a number or something? srry for all those questions..... |
I think if you close it with Cancel your values will not update.
Load the original foot. Select a vertex (left innermost vertex). Open the Extra Data Tool, look in the VertexID box, it should say 30002 (I think that was the value, from memory). Go around the foot, making note of the values from the original, load teh clone and put the values in, Save All, Export, enjoy. I will be issuing a new Extra Data Tool soon that should have the buttons visible, although I do not know for sure why they don't look there like they do here. My bad, I am sure, but we will work through all this eventually. <* Wes *> |
Thank you!!
I was puzzled how the first version worked ingame(the sims2 version) and after some testing i found out. If you import the original foot first, then mine, select all and then weld the verts together from both the original and custom, the custom one gets automaticly the vertID's. That is prolly why the first version of the feet didn't have the gap. But when doing that it also generated new verts. And i think those new verts prevent the seams on the uvmap from being screwed because welding all together normally will also connect all those uvcoordinates.. I changed DPI setting from 120 to96(normal) and i just can see the outer topline of the bottoms. Got the top row fixed, gonna see ingame :D |
Back again lol....
If i build a default replacement package from one of the female bra's and try to make a simple edit to the mesh(pull out a vert) the plugins will also generate 5 0r 6 times as many vertices for the morphs, not the base mesh. I just noticed when i was importing the morphs with Postal The base mesh has 1780 verts and 2926 faces while all the morphs have 10537 verts and 2926 faces. Normally this will crash your game but the files get ignored(seems) |
I did tweak the morph code the last time I revised them... for you, I think.
I will look here and see if I can replicate that. If not, I will ask for help. <* Wes *> |
I just tried v0.10 and those export correct(no huge ammount of verts) but they exported without any comments in the boxes.
That is wat you fixed earlier for me. The morphs have now(with v0.14) the same comments as the base mesh. Im switching back to v0.12 as those seemed to work. |
I will review that carefully... the morphs should not have the same comments as a base mesh, that is wrong. Of course, it should not create a crazy number of vertices, either.
<* Wes *> |
Please help me!
I think I installed everything but Q-mesh does not appear |
Hey Wes
I got another small issue with the plugins. I made a female mesh loaded and edited with the correct skcon file. I saved it under another name and the next time i import it it will load the correct skcon file, no problems there. I want that same mesh available for males also, so i imported a default male mesh with the correct skcon file and then import the female mesh. When importing that mesh i get no messages but after i export it the next time i import i get the message the default skeleton is used and not the male skcon file(wich is there in the folder.) So it seems the male skcon file got overwritten by the one from the female. Atleast that is wat i thought but after trying to do the same with the female teen and adult female.(scaling the mesh to teen size.) the mesh used the correct skeleton ingame except i still get the message it uses the default skeleton. With Unimesh you could easily fix skeleton issues by importing a original basegame mesh/skeleton, then import your custom one and export, it would replace the skeleton. With these plugins i keep gettin ''default skeleton used'' EDIT, sorry...i found out wat i did wrong. You have to copy the data from the GEOM-00 comment box and paste it in the box from your imported mesh(GEOM-01) |
Thanks for leaving your post up. You have the correct answer, and perhaps someone else will be searching for a solution to that, find you post and fix it.
There is actually only a part of the comments that would be needed to be copied, that is the "TgiRefXX" line (XX is some digits) that has "00AE6C67" in the first column. The rest of the line is the group and instance for the bone (.skcon) file you want. The others are references to default textures and bumpmap textures for the mesh. You can change those values to be different DDS files if needed. <* Wes *> |
Quote: Originally posted by Kiara24
Please help |
If it does not appear, you have done something wrong.
This plugin requires at least MilkShape 1.8.5 beta1 to work, it will not work on MilkShape 1.8.4. |
yup, thats why i left the post as it was...)
Thnx for your help, the tootsies are up(the females) at http://www.bloomsbase.net/ |
Quote: Originally posted by WesHowe
So the problem is that... I have MilkShape 1.8.4.Thanks! |
Good. 1.8.5 is a free upgrade, and there is a reason this requires that version. Hair meshes have an extra values in them that does not fit into older version of MilkShape. Mete (the author of MilkShape) added that in there to support Sims 3 meshing for us.
The object mesh plugins (in a different thread) are supported by older versions, back to 1.7.8. That's because the object meshes do not have that feature in them. I hate to make you guys & gals chase these updates down, but the MilkShape one is for a very good reason, and the Visual Studio 2008 Runtime is just a newer version of the Visual Studio 2005 Runtime, which most people probably already have installed. The 2008 edition has some added security features, and at some point in time, if you didn't install it for me, something else new you get will require it. <* Wes *> |
Thanks
|
Hey Wes
I was wondering if you would be willing to include a commit all button within the extra data tool? |
Commit All from the BoneTool is the same as the Save All button. There is no Commit button in the CCTool, it gets committed automatically with the "copy to all" button.
What is it that you are trying to do? Perhaps I can help solve the problem. |
I want to unassigne all vertices, all set to 0.(the vertID)
But keep the bonesettings But the mesh im testing has 1960 vertices.......so setting them all to zero is a alot work lol. |
I posted on this in the GEOM Tool thread, as the topics are related. We can do something, if we can decode what needs done... adding an auto-renumber button is possible, it could number any morphs that are loaded the same as the base.
|
Ye, that would be way cooler!
|
Let's finalize a plan in that thread.
|
I dont know if this is caused by your plugins but by using a external uvmapper(like Unwrap) the vertID numbers go bizar.
Like making one foot, then duplicate and mirror it/then move the coordinates from the copied foot on the uvmap(so that they are seperated) Then save as ms3d and open it with unwrap. Select one foot and mirror the uvcoordinates and save as luv. When i imported that newuvmap back into Milkshape all vertID's on the foot went bizar...like from 1 to millions :D And i always lose half of my bonesettings when doing that(same with sims 2 meshes), strange isn't it? I do get a message that i might need to reweld the seems but often irrelevant. |
The VertexIDs and TagVals are stored in the .ms3d file, but I don't think that data field was added until maybe version 1.8.0. I ran a test here with UU3D, resaving an original EA mesh with a copy saved as an .ms3d file, and the VertexIDs were just zeroed out.
All of these external programs are probably several MilkShape versions behind on their file format support. Although the extra were added in 1.7.8, somewhere between three and four years ago. I don't have any good solutions for ways to retain the values, as they are getting lost in the file transfer process, but if I get the autonumber plugin working it will make the issue irrelevant. <* Wes *> |
Yup, o well i am used to it and know how to fix most of the issues.
Another thing....srry When i have a base mesh and its morphs loaded i can not import another morph for, lets say using parts. I know you prolly did that on purpose, to avoid implosions and errors. Is it possibly you take that warning(think it was ''verts dont match or something) out on the next plugins? It is is impossible to combine diffrent clothing meshes right now....also importing a objective file fails, it simply dissapairs(only when morphs are also loaded.) srry, thinking ahead |
I am thinking through what you requested, and I think you can do this already by loading the base, then the morph, deleting the base group, changing the comment and saving the mesh data out as a different file type with weights, via UniMesh. I think the main changes will be juggling the comments to do so.
On disk, morphs are very different from base groups in basic ways. The plugins know how to convert morphs to meshes, and meshes to morphs on export, but it does this always the same way, base as the first group and additional groups as morphs, because GEOM files only ever have one group per file. If you use a weighted format like UniMesh has, and adjust the group comments using cut-and-paste, then the only difference will be the VertexID (except for hair, which may also have TagVals). I am actively working on the autonumber plugin, which, if it works right, should make the final step be to just number the VertexIDs and then make a new BGEO. Try that and see if it doesn't work for you. However, I learned on TS2 that most of the time trying to edit a morph in parallel with a base ends up being a disaster. The best way is to edit your base group until it looks good and is mapped the way you want, and then duplicate it, change the comments and just move vertices to form the morph. I know you are making special things, and have more than average experience in doing so, but trying to combine morphs with morphs is going to be hard. When I get you the autonumber tool, it will make the process a lot easier, because aside from the VertexID, everything in a TS3 mesh (once loaded into MilkShape) is just like TS2 except the comments, and those can be managed well with cut-and-paste. This is why the BoneTool from TS2 works in TS3, because it is a basic mesh item and the same dude wrote both plugins. <* Wes *> |
Roger that sir
|
FVFItems: 7
TableType: 2 Were does the 7 and 2 stand for? I see this with bodymeshes Accesoires have 6 and 1 |
These are slightly misnamed, but I had the code written before I learned a bit more detail on the format.
TableType: is a set of flags that are part of the bone hash list table. I am not sure what the value differentiates, it is probably bitmapped, but having it in the comments allows it to carry over from the import to the export. FVFItems: is also slightly misleading. It is the number of items in the Flexible Vertex Format table. Since the game always uses the same sets of format order, the count allows me to make an output that includes all of the elements used in the import. But the flexible vertex format is really a list of what elements are included in the vertex. All mesh types have at least three elements, position, normal and VertexID are in the morph files, but position and normal are deltas, they must be added to a vertex position from a regular mesh, and when that is done you have the new morph position and normal. That is why the morphs have to be loaded after the right base is loaded, because they are useless without the base position data. Type 6 is a mesh with position, normal, UV, bone assignment, skin weights and tangent (bumpmap) normals. Six items. Because there is no VertexID, this type never has any morphs. Type 7 is a mesh with the previous items, but either a VertexID or a TagVal is inserted after the skin weights. There is a different comment (HasTagVal that remembers which one. Some hair meshes use this value, with the TagVal. Usually, though, it is a body mesh with a VertexID and there is probably one or more morphs for this.Type 8 has everything, both a VertexID and a TagVal. These are (I think) all hair meshes, although maybe the face meshes use this type also. The importer follows the FVF item list, but once loaded, all that is saved is the count, and for type 7 whether it have a VertexID or a TagVal, and on export the order written includes the right elements, but always in a fixed order. It isn't a perfect implementation of the standard, but it save a lot of unnecessary detail, because most of the possible configurations of elements are useless on a practical level. The exporter also makes sure that for a Type 3 that it exports deltas instead of true positions, making a morph mesh instead of a regular one. If you are making accessories from regular meshes, just change those two values, and the exporter will leave out the VertexIDs. If you are changing accessories to regular meshes, you will need to add VertexIDs and change the two comment values. The GEOM format is documented at http://sims2wiki.info/wiki.php?title=Sims_3:0x015A1849. |
Thank you
i am making a accesoire that moves with the sliders. And when using the correct TGI reference for the bones it works perfect. But somewhere along the way i lose a material setting, the transparancy that i need. Or(when using the settings for the accesoire) i lose the VertID's just need to find the correct settings to have both |
Yeah, the Type 6 will not save the VertexIDs. You need a Type 7 to save them.
All of the comments that start with "Embedded" are the materials data, so that is where you are losing your transparency at. Copy them all, as a set, because it is a single data block. |
Aha...
|
Do these plugins work for Blender, or are there plugins that work for blender?
|
There is a blender plugin for body meshes in another thread. Search should help you out.
|
Hey Wes,
How important is the skeleton file you mentioned in your tutorial?(glasses) I never use the one that comes with the geom file but use your default one(included in the plugin?) I am asking as i am now struggling with accesoires that do look ok in CAS but are off position ingame. Do i need to use the original unk(skcon) file when importing a mesh in Milkshape? |
There are variations in some of the files, especially on the non-core joints, and that is why I went to all the effort to write in the .skcon file read. You remember the problems that happened in TS2 when someone moved a joint (until I turned that off). I believe a similar thing will happen with the joints here.
You should be able to check the alignment by pulling the .skcon and importing the modified mesh files (not have to track back to the beginning). If your accessory is not properly positioned then, you can move it. Remember from the feet project that VertexIDs are used by the sliders and affect alignment even when you aren't actually using them. |
I understand.
Going to check it out |
Quote:
Back But these are accesoires...they dont have a vertID. I will clone a clothing mesh and convert it to accesoire, see if the problem remains. Edit, Think it is in the feet mesh(the toes)...those verts dont have a vertID. I hope you reconsider adding a commit all button to the extra data tool because i have to reassigne more then 500 vertices(toes) to one single vertID...for each foot. |
hi wes
Is this tutorial suppose to replace the default glasses.. i've done it works great thanks but the originals are not in game now?? if so how do i make stand alone meshes?
|
Now, go use your newly developed skills with Delphy's CTU Tool.
|
I've downloaded this and dragged the files into the milkshape folder but it's still asking me to pay. What am I doing wrong, what do I go into after import? I'm soo confused.
|
If Milkshape is asking you to pay it probably means that your 30 day trial period is over. To continue using Milkshape you'll have to register it and that means you'll have to pay for it.
I'm confused as to what your next question is asking. Perhaps you could start your own thread about it with a few more details? OM |
I didn't get a 30 day trial period
|
Well, for issues with MilkShape, you can go to the MS forum here:
http://www.chumba.ch/chumbalum-soft/forum/ I hope that helps. OM |
Chumbas administrator has disabled registration so I can't ask about milkshake there
. When I import a mesh extracted by CAS I can't see it to edit it in milkshape because blue scribble is all over it. 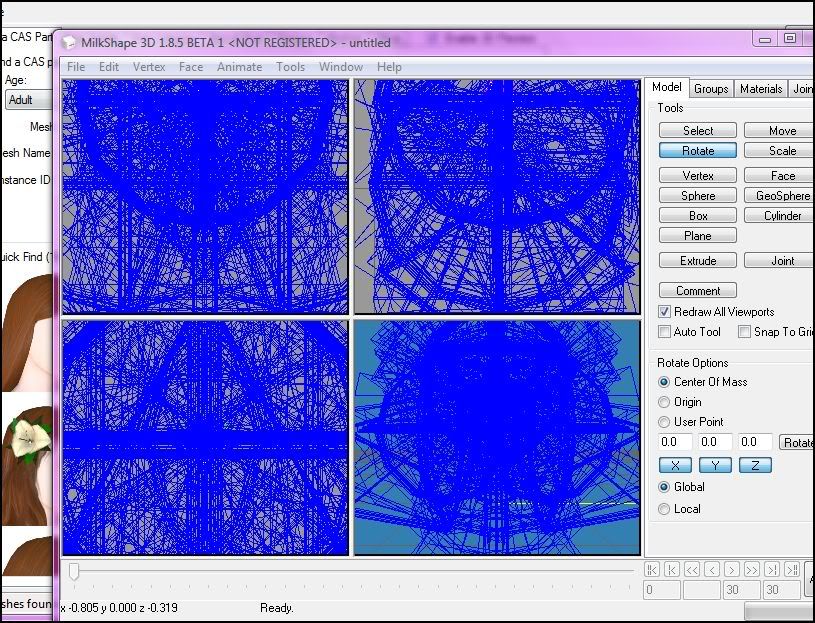 Anyone encounted this? Am I doing something wrong? |
Mete is on vacation, so he disabled registrations until he gets back. Unless you have ever tried to run a website, you have no idea of how many 'robots' try to create user accounts every day in attempts to get messages posted advertising work at home, easy pharmaceuticals and body part enhancements... these have to be cleaned up after.
I also answer this question regularly... if I was smart, I would keep a link to one of my answers. But I am not so smart, I guess. The problem is one of scale... by default, MilkShape uses a scale of 1.0 for the circles used to draw joints with. TS3 uses a scale where 1.0 is a meter, so the joints in their default size are huge, and overlap each other. The joints are colored blue, and that is what the blue lines are. In the File menu for MilkShape is an item "preferences". Choose that, and in there a tab called "misc" will be a place to specify "Joint Size". Use somewhere around 0.01 to 0.012 (adjust this to your preference) and you will see the blue lines appear as a skeleton. In the "Joints" tab is a checkbox, Show Skeleton, which will toggle the skeleton display on and off altogether. |
Genius, I love you! Thanks for your patient retyping of old answers!
|
Well, the error is there because the importer expected to find a number smaller than 256 and found something larger. Either the file isn't right or there is a variation in some files that is not reflected in the coding.
I need an example of one you are having trouble with to look at this in more depth. |
I have checked it over. The file is properly formed, but defective. The number of polygons shows to be 5,024, but the polygon data block contains 7,167 polygons.
The tail end of the file has one byte missing. But even after altering the length value and inserting the missing byte, the file did not load properly, some of the face indices seem to be out-of-range. I don't think this mesh could possibly be loaded by the game, it probably just silently rejected it and used some default mesh. Please don't ask me to fix any more Peggy hair meshes. It is a waste of time. |
It's the Peggy syndrome... her stuff frequently has problems that should never have been released that way. Attention to detail and basic testing appear to be absent from her work methodology.
|
Question: What does it mean when I try to import a morph over what I believe to be the correct base, and the importer gives the error: "Vertex tag value does not match base" ?
|
There is at least one VertexID in the morph file that does not match the corresponding vertex in the base file (group 0).
The error message text probably predates my finishing teasing out all of the GEOM spec details... much was done by building an importer as I went along, testing details in what would become the plugin. As a consequence, it lacks some of the structure it may have had if I was able to start with a written spec. |
Wes, i am afraid you switched the plugins with a older version?
when i export the mesh with its fit/fat and thin morph i end up with 4 identical files were the TGI references etc are also stored in the morphs.  When i edit the comment boxes and give both the basemesh and its morphs the correct comments i get the error: '' Face list of basegroup must match morph face list '' Edit, Oh crap.... I imported a basegame mesh and all the morphs, then imported the base mesh but already edited. I knew exactly wat i edited so i switched the base meshes and edited the morphs the same way as the base. Unfortunate all get messed up when exporting .Should be possible in theorie not? All have the same ammount of verts and faces. When i reimport the mesh and its morphs the plugins import them as new meshes with the same comments as the basemesh but all vertID's are gone... Renumbering gives me a error '' Face 1 point index 26 doesn't match base index 2 '' |
The morphs have the vertex and normal deltas, the VertexIDs and the face list (all the polygons). In all of the game files, the VertexIDs and face list match exactly between all of the morphs and the base file (for any one LOD).
So the exporter and importer check that all of these match, too. I would be remiss if I let unusable files to be generated. The issue with the face (triangle) lists is to make sure the vertex order is the same. A typical triangle list might have 0 1 2 for the first triangle, meaning the vertex numbers. 0 2 1 would be the same triangle with the vertex order reversed. But because of the reversed order, that triangle will not morph properly. I can tell you that making morphs in something like Maya starts after the mesh is finished, and is done by duplicating the mesh, and then changing some attributes that make it be a morph, and then the artist edits the vertex locations. That is also the way you should make your morphs in MilkShape. If I relaxed any of the morphs mesh checks and restrictions that are built into the exporter, you will just waste time making files that won't work right in the game. |
I was afraid of that....i guess it kinda ends for me here.
Making morphs from the basemesh is way to much work, something i already stopped doing with the alphadresses for the sims 2. Its not just a matter of scaling here, i have to adjust/edit every single vertex and doing that for 4 meshes....... Edit, Found out wat is the problem..... With the Unimesh export all morphs get a copied uvmap from the base mesh wich automaticly fixes updates and edits. The GEOM plugins ignored these edits and stick to the original uvmap. |
I am struggling to understand what is wrong here. Did part of what you worked on use UniMesh? That would explain where the lost VertexIDs went.
In TS3, I can no longer automatically split vertices at UV Map seams, like UniMesh does, because it causes the morphs to have the wrong vertex count and face list. If the Q-Mesh exporter complains that "Face 1 point index 26 doesn't match base index 2" then the second triangle, third point of the morph (which is referencing vertex index 26) is not the same as in the base mesh... the triangles are in a different order, so your morphs will not have the vertices all matched properly, some are going to be swapped. If you have triangle points swapped, you may get an explosion of a lot are swapped (off by one) when the morph is triggered, or if just a few, you will get some section that twists when the morph happens. So swapping an edited mesh for the base is possible, but not if the edits that were made change the base mesh face structure. |
I cloned this fullbodydress, removed the legs and the part were the legs were attached to the dress.
Then made this dress a top so i could use it with the nude and undie bottoms In Milkshape i made a very small edit to the base mesh, i split up 2 faces(one on the right and one left side of the dress) to avoid some clipping with the bottom. I also regrouped a part of the dress in order to move it to another position on the uvmap. Had to do this as top and bottom textures are overuling eachother.(fullbodyoutfits that are made with tops and bottoms use just one texture file.) Besides that i spent hours to fix boneassignements and moving other verts arround so it animates smootly with the underwear bottoms Unfortunate the morphs caused clipping as they do not have the same measurements so i had to adjust those to. And since i only split up 2 faces and regrouped and moved a part on the uvmap on the basemesh i thougth it was easy. I have done similar things before with adding nipples and such but this time i could not get the morphs exported correct. I ended up with completly deleting(regrouped them to use the data tool later) the lower part of the dress on the morphs, the part i regrouped Then had to copy that part from the basemesh 3 times and used your data merge tool to give them the correct shape for the morphs again. After all it was just 1 hour extra work but i think its wise to edit the base mesh while the morphs are also included and save them as ms3d file before i delete them and go testing with the base mesh. |
I always save my stuff as an .ms3d file. Sometimes lots of them, so I can go back to previous versions when I mess up.
So have you got this fixed? I think I am reading that from your message. |
| All times are GMT +1. The time now is 12:58 PM. |
Page 1 of 3
|
Powered by: vBulletin Version 3.0.14 · Copyright ©2000 - 2024, Jelsoft Enterprises Ltd.