- Site Map >
- Modding and Creation >
- Sims 2 Creation >
- Tutorials >
- Bodyshop - Milkshape: Adjusting UV Mapping On Your Modified Body Mesh
- Site Map >
- Modding and Creation >
- Sims 2 Creation >
- Tutorials >
- Bodyshop - Milkshape: Adjusting UV Mapping On Your Modified Body Mesh
Test Subject
#26
 24th Feb 2008 at 5:19 PM
Posts: 2
Actually, I found it!
For others that cannot find it; look for a zip file underneath the box that displays all of the pictures included in this thread. [At the very end of the message] =D
For others that cannot find it; look for a zip file underneath the box that displays all of the pictures included in this thread. [At the very end of the message] =D
Advertisement
#27
 9th Jul 2008 at 2:34 PM
Posts: 347
Thanks: 29598 in 80 Posts
Note (if somebody is heedless like me):
The size of all uvmap punctually (the screenshot): 1024*1024
Because the size of alpha (for example in the Photoshop): 1024*1024
- when You make the recolours/retextures.
The size of all uvmap punctually (the screenshot): 1024*1024
Because the size of alpha (for example in the Photoshop): 1024*1024
- when You make the recolours/retextures.
#28
 11th Aug 2008 at 5:36 PM
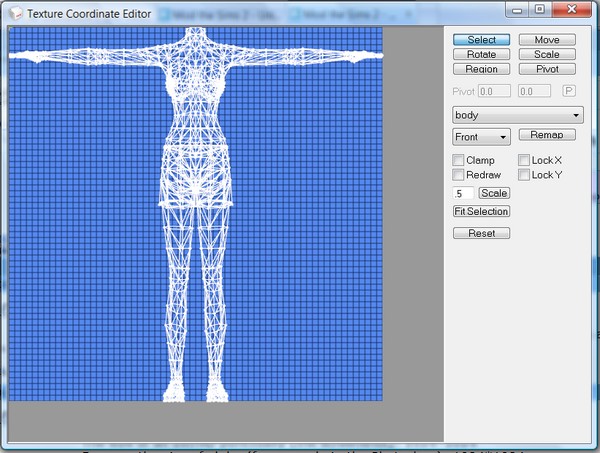
I'm having a terrible problem with a new mesh I'm working on. The UV map has changed to this and I can't change it back to the 'front/back' view. It is making recoloring imposible. Any help??


#29
 11th Aug 2008 at 5:52 PM
DLMulsow - Looks like it must've gotten remapped at some point. Either return to a previous saved version if you have one, or start over - that's not fixable.
my simblr (sometimes nsfw)
“Dude, suckin’ at something is the first step to being sorta good at something.”
Panquecas, panquecas e mais panquecas.
my simblr (sometimes nsfw)
“Dude, suckin’ at something is the first step to being sorta good at something.”
Panquecas, panquecas e mais panquecas.
#30
 11th Aug 2008 at 10:45 PM
I could just cry. LOL
Thank HP, I appreciate the help. I was hoping there was a fix because it took me forever to build.
I did accidentally change the UV because it started out with the front/back views. I zigged when I should have zagged and couldn't change it back. Freaked and saved.
I was not wise in saving a previous version. I think this is a perfect time to learn a valuable lesson to do so next time.
#31
 12th Aug 2008 at 9:58 AM
Sorry this response is late - but save with version numbers!
Seriously -- do one part of your work - save it as body1... then body2, body3... etc
Then as long as you catch a problem early enough, you only lose part of your work.
Good luck. You remapped the entire mesh somehow.
"Undertake something that is difficult; it will do you good. Unless you try to do something beyond what you have already mastered, you will never grow." - Ronald E. Osborn
Please do NOT PM me with requests, creation questions, or game help questions. Click for help:
Game Help | Create | Content List | Where Can I Find?
Game Help | Create | Content List | Where Can I Find?
Test Subject
#32
 30th Oct 2008 at 5:48 AM
Posts: 4
When I clicked on the link to download it, when I tried to put it in milkshape a popup comes up and says "templates-patternsforuvmap You don't have permission to open this file. Contact the file owner or an administer to obtain permission." What do I do?
Test Subject
#33
 1st Dec 2009 at 6:07 AM
Posts: 5
Should I create a seperate UV map for each peice and then combine them? How is this different from creating only one after the peices have been combined?
Any help or hints would be greatly appreciated.
Thanks
Gia
Test Subject
#34
 2nd Jul 2012 at 8:37 PM
Posts: 9
I see that no one replied in this thread for a long period, still I hope someone would help me if I ask.
I'm now trying to make a mouse tail from the Maxis glasses. In order to do this I remained only one thin part of glasses and deleted the rest, moved it to the right place. Then I've made thin tail from it with a command "Extrude". I know you not recommend to use such a command, but the command "Subdivide 4" caused vertices to multiply progressively as I added new rows of them, so it's not sutable for this. Of course, the new part of mesh appeared to have UV values of "0". I tried to remap the new part, and now I can see my new vertices in the UV-map, and I can also see their U and V values in the "Manual edit". But still, the new faces have no texture on 3D screen, and they look black, except some faces on the end of the tail, where I snapped a row of vertices together.
I wonder if the command Extrude makes something unacceptable to the mesh. If so, maybe, you can advise me another sutable command for making long and thin tail?
Sorry if my English is bad. I am Russian.
Test Subject
#35
 3rd Jul 2012 at 5:59 AM
Posts: 9
Don't puzzle yourself anymore, people. I've already solved my problem myself. I just needed to align normals. You see, the light falls on glasses frame vertically (because they are oriented horizontally), and the tail is oriented vertically, except tiny end, which I curled a bit. So, the model was black not because the texture was not assigned properly, but just because it was not lighted properly. Sorry for this question... 
Who Posted
|
|

 Sign in to Mod The Sims