 Sign in to Mod The Sims
- Site Map >
- Modding and Creation >
- Sims 2 Creation >
- Tutorials >
- Bodyshop - Tutorial - How to make a top out of a picture?
- Site Map >
- Modding and Creation >
- Sims 2 Creation >
- Tutorials >
- Bodyshop - Tutorial - How to make a top out of a picture?
#226
 28th May 2007 at 11:13 AM
28th May 2007 at 11:13 AM
summer_wine
First of all, if you would go look in the stickied thing for the uvmap and get the uvmap for the outfit, and overlay it with your graphic, some of the issues would become totally clear. The body is mapped to a fixed location. The width of the say, 'back' or 'front' of the sim is fixed, and is square, as you see in how the original alpha is shaped. There is no 'waist that comes in'.
On your new alpha, you cut the waist in to match your graphic, but the graphic is not wide enough on the back of the sim, thus you now have a little hole where that front/back seam is. You will have to stretch/reshape/widen the back to cover. If this change is too much and makes the front and back stripes look uneven, then you will need to widen the front by the same amount.
Your straps are missing because they are off the uvmap. You'll need to reposition them/make simple ones that are further in, you placed them inside the armpits/arm.
If you go grab the uvmap (all the basic ones for sim meshes were done) and lay it in a semi-transparent layer over your work, you'll be able to better plan the layout of all your parts. The uvmap thread is stickied top of the main bodyshop-meshing discussion forum.
Bluesims picked a deceptively simple and well laid-out graphic to transform - most other graphics (like photos of a model wearing the outfit, or from a site that puts the outfits on 3d shapes) are going to require you to sometimes create your own little bits by creative cutting and pasting or otherwise modify your source graphic to fit the proportions of the sim.
"Undertake something that is difficult; it will do you good. Unless you try to do something beyond what you have already mastered, you will never grow." - Ronald E. Osborn
Please do NOT PM me with requests, creation questions, or game help questions. Click for help:
Game Help | Create | Content List | Where Can I Find?
Game Help | Create | Content List | Where Can I Find?
Advertisement
#227
28th May 2007 at 11:06 PM
Last edited by summer_wine : 29th May 2007 at 1:48 AM.
Reason: added question
28th May 2007 at 11:06 PM
Last edited by summer_wine : 29th May 2007 at 1:48 AM.
Reason: added question
Posts: 331
thanks tiggerypum! i will check out that thread right away! 
ETA
I fixed it! yay! but now i have lines going down the sides of the dress. i tried blurring it but it doesn't seem to do anything i read the other tuts and i can't seem to make the lines disappear.
any advice would be greatly appreciated thanks!

ETA
I fixed it! yay! but now i have lines going down the sides of the dress. i tried blurring it but it doesn't seem to do anything
 i read the other tuts and i can't seem to make the lines disappear.
any advice would be greatly appreciated thanks!
#228
29th May 2007 at 8:45 AM
29th May 2007 at 8:45 AM
Go to the stickies in the main bodyshop skinning area (not the tutorial area) and look for uvmaps. Among other things you need that belt to match up - and you'll be able to see exactly where the seams are and where the dots are (I also bet if you made sure the belt was vertically aligned front/back that would almost do it in and of itself)
And go look at your clothing. There are seams running up and down the side and the fabric does not match. I think it's unlikely with that particular pattern that you will get it seamless on the seam. What you want smooth/seamless/properly shaped is the top edge and trim and the belt.
"Undertake something that is difficult; it will do you good. Unless you try to do something beyond what you have already mastered, you will never grow." - Ronald E. Osborn
Please do NOT PM me with requests, creation questions, or game help questions. Click for help:
Game Help | Create | Content List | Where Can I Find?
Game Help | Create | Content List | Where Can I Find?
#229
1st Jun 2007 at 11:08 AM
1st Jun 2007 at 11:08 AM
Posts: 10
You know one thing just to tell everyone it's a lot easier if you did this:
Take a shirt from Maxis that fits your criteria or a whole outfit. Then open it up in Photoshop and adjust it so when you place it in the maxis mesh that it fits directly over it, trust me it's easier to make an outfit with it. SO you just throw it up there and then after that click on layers on the toolbar and flatten it, then and can put some designs on it by getting so great pictures from:
www.ask.com
www.google.com
or any random site, and then up open it up as a new item in Photoshop then you use the triangle marquee to select the picture then paste it into the shirt page and change the opacity so that it fits the curves, then *make sure it's still on the layer* and click on Image-Adjust-Brightness and Contrast and make it darker. Then flatten image it makes it look better. I've been doing that before I even read a tutorial ever since Faylen recolor tutorial. Bye the way thnx.
Nice work though BlueSims.
At least you took the time into snapping pictures, I really don't know who to break it down all the way but I'm getting my tutorials and diffrents up on my web, so I'm kind of a little tempermental.
Not wanting to be rude or anything.
Harry better not die! Or Ron or Hermione! Don care about Ginny but keep the twins!Die Voldemort and Snape!
My view of the Deathly Hallows
#230
14th Jun 2007 at 6:46 AM
14th Jun 2007 at 6:46 AM
Posts: 24
could this bew done with dresses as well but using adobe in stead o corel.and what those this mean Strg
What goes around comes back around
http://www.missingstudios.com/ms/signaturegenerator/finished/mysig_1137404670.jpg
What goes around comes back around
http://www.missingstudios.com/ms/signaturegenerator/finished/mysig_1137404670.jpg
#231
14th Jun 2007 at 9:17 AM
Last edited by tiggerypum : 14th Jun 2007 at 9:22 AM.
14th Jun 2007 at 9:17 AM
Last edited by tiggerypum : 14th Jun 2007 at 9:22 AM.
onika - STRG is like 'ctrl' - it's just what it's called in Bluesim's country. At any rate you'd need to use the command that works in _your_ software program. ctrl-c for copy is pretty standard, but some of the others will not be.
You can do something like this tutorial with any sort of clothing - although you might need to stretch or shrink parts of it to get it to all line up correctly.
What you need to do is follow along with the *ideas* of what the commands do and translate it into what you can do with corel (which should work, as it has layers and all the general tools) If you are not highly experienced with corel, I would suggest looking on the web and doing an assortment of tutorials that teach all sorts of interesting effects and such - by doing the projects, even if they are not directly related to sims, you will gain the ability to do whatever you set out to in corel.
Also note: BlueSims made a very nice tutorial here, but picked a top that has an almost perfect graphic for the job. Just be aware that you will need to do more extensive editing to get most photos to look good on a sim body.
"Undertake something that is difficult; it will do you good. Unless you try to do something beyond what you have already mastered, you will never grow." - Ronald E. Osborn
Please do NOT PM me with requests, creation questions, or game help questions. Click for help:
Game Help | Create | Content List | Where Can I Find?
Game Help | Create | Content List | Where Can I Find?
#232
14th Jun 2007 at 10:49 PM
14th Jun 2007 at 10:49 PM
Posts: 24
ok thanks for answering that but that blur tool am lost on what too do with it so the saide look even and not any line showing.
What goes around comes back around
http://www.missingstudios.com/ms/signaturegenerator/finished/mysig_1137404670.jpg
What goes around comes back around
http://www.missingstudios.com/ms/signaturegenerator/finished/mysig_1137404670.jpg
#233
14th Jun 2007 at 11:32 PM
14th Jun 2007 at 11:32 PM
Well, I am sure there must be a blur or smudge tool in corel (there's one in photoshop, it seems to be a pretty common tool) This would be a time to look for tutorials that use it, or the program's documentation/help.
It could be that when you made your selection that your selection tool was set to a higher setting and thus your clothing doesn't have a white halo around it. It's also possible that the garment you are skinning extends all the way to the edge of the sim already and you won't need to fill in any side edges.
If you do find you need to patch/fill in some area of the garment, then you'll just need to zoom in on that area (I always look at 200%) and make sure that any transition from the photo garment to the filler fabric you put in is blended. The blur tool or smudge tool can help with that, as can careful handpainting. Sometimes you might need to cut and paste another area of the garment to do the fill in instead of relying on a solid fill color.
"Undertake something that is difficult; it will do you good. Unless you try to do something beyond what you have already mastered, you will never grow." - Ronald E. Osborn
Please do NOT PM me with requests, creation questions, or game help questions. Click for help:
Game Help | Create | Content List | Where Can I Find?
Game Help | Create | Content List | Where Can I Find?
#234
15th Jun 2007 at 5:12 AM
15th Jun 2007 at 5:12 AM
Posts: 24
i don't know if anyone has ask you this but your are really good at answering question what i wanted too ask you is can you do this tutorial in a englis version of either the adobe photoshop or the corel but with a dress instead pretty please am really trying too understand but for some reason am lost.
explecially at these partswhere she says:
Next we create a new layer. We work on this layer from now on. So we seperate the new skin from the background.
Just click on the layer symbol shown in the image and in the next step click OK.
We make a small trick: just copy the right back wearer to the left.
Take the selection tool to mark the right wearer,
press Strg + C, mark the left wearer and delete it, press Strg + E to paste the right wearer on the .bmp, press Strg + M to invert the wearer horizontally.
That should look like this now:
Now we make a new layer again. But be sure that this layer is under the layer with our top.
In the layer palette click on the background and then create the new layer.
With the selection tool mark an area shown in the picture above.
Fill this area with an orange color with the "Farbfüllungswerkzeug" (Filling tool)
What goes around comes back around
http://www.missingstudios.com/ms/signaturegenerator/finished/mysig_1137404670.jpg
#235
18th Jun 2007 at 1:09 AM
18th Jun 2007 at 1:09 AM
Posts: 24
Quote: Originally posted by Topaz
|
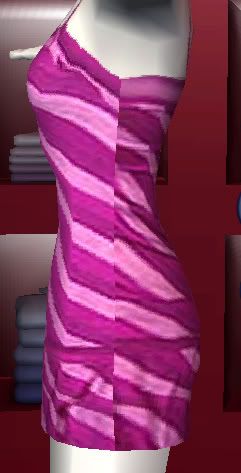
I posted a picture of what it looks like. I am norwegian and not so good at explaining things in english In the picture you can si that the top is in two pieces. Back and front. I wonder why, and what to do with it.
|
Thanks for explanation, I had the same problem. I'm so glad someone elso uses blur tool too, every other tute says it should br dealed with cloning and stamp tool... Thanks again!!!
Vivat nostra civitas Mod The Sims 2, vivat, crescat, floreat!
#236
18th Jun 2007 at 11:25 PM
18th Jun 2007 at 11:25 PM
Posts: 13
WOWIE WOW WOW WOW!!! This is awesome! Thanks. Plus that website you gave for clothing example has some cute stuff that is VERY cheap (just in case your sim isn't the only one you want to look cute). ;P
#237
19th Jun 2007 at 12:38 AM
19th Jun 2007 at 12:38 AM
onika59,
I suggest you do all of the basic photoshop tutorials about doing clothing by modifying the Maxis outfits. Do them in order. There are at least 4 of them, by Faylen. They teach about layers and alphas and the layout and the sorts of things you need to get a basic understanding about in order to modify _any_ clothing item.
Then if you come back here and look at this tutorial, I expect it will make a lot more sense. If not, I suggest you look for more photoshop tutorials on the web that do not deal specifically with making clothing for sims, but teach working with layers and various features of photoshop until you feel really comfortable with layers and how they work.
"Undertake something that is difficult; it will do you good. Unless you try to do something beyond what you have already mastered, you will never grow." - Ronald E. Osborn
Please do NOT PM me with requests, creation questions, or game help questions. Click for help:
Game Help | Create | Content List | Where Can I Find?
Game Help | Create | Content List | Where Can I Find?
Test Subject
#238
20th Jun 2007 at 6:04 PM
20th Jun 2007 at 6:04 PM
Posts: 1
Thanks!
Oh My Gosh I've Been Waiting For Something Like This For Ages!
I Got Fed Up Of Downloading Things Because i Have To Download WinZIP And For Some Reason I Cant Do That
But Thanks So Much For This Tutorial Its Great!
I'm Gonna Go And Make Something Now

Test Subject
#239
29th Jun 2007 at 6:59 PM
29th Jun 2007 at 6:59 PM
Posts: 17
Cool. Good tutorial.THANKS!
#240
5th Jul 2007 at 7:15 PM
5th Jul 2007 at 7:15 PM
Posts: 19
Thank You!
#241
10th Jul 2007 at 9:27 PM
10th Jul 2007 at 9:27 PM
Posts: 17
Thank you so much for this. =)
It's been really, really helpful.
It's been really, really helpful.
#242
14th Jul 2007 at 12:17 AM
14th Jul 2007 at 12:17 AM
Posts: 24
ok i love this tutorial it has helped me alot only thing i was wondering if some one could do it over but using the english version or corel photoshop
What goes around comes back around
http://www.missingstudios.com/ms/signaturegenerator/finished/mysig_1137404670.jpg
What goes around comes back around
http://www.missingstudios.com/ms/signaturegenerator/finished/mysig_1137404670.jpg
#243
25th Jul 2007 at 12:13 AM
25th Jul 2007 at 12:13 AM
Posts: 75
Thnx bluesims. I've been making shirts with this tutorial and I never had time to thank you.
So...Thnx!
So...Thnx!
When you jump on your way down why do you ask yourself why did you jump?
Sometimes the quote 'think before you leap' comes in handy at that point
If you happen to see me down there you'll know I wasn't following my advice
Then we all know what happens...SPLAT!
#244
30th Jul 2007 at 6:23 AM
30th Jul 2007 at 6:23 AM
Posts: 70
Thanks: 162 in 2 Posts
Quote: Originally posted by tiggerypum
|
onika59, I suggest you do all of the basic photoshop tutorials about doing clothing by modifying the Maxis outfits. Do them in order. There are at least 4 of them, by Faylen. They teach about layers and alphas and the layout and the sorts of things you need to get a basic understanding about in order to modify _any_ clothing item. Then if you come back here and look at this tutorial, I expect it will make a lot more sense. If not, I suggest you look for more photoshop tutorials on the web that do not deal specifically with making clothing for sims, but teach working with layers and various features of photoshop until you feel really comfortable with layers and how they work. |
I have done ALL of Faylen's tutorials....AND...it's true, when you return here it makes much more sense!! A lot of what I didn't understand when I first looked at this tutorial and others had to do with me not understanding my photo editing program very much. (I use Photoshop)
By doing ALL of the tutorials, and others that you can find online, you will become more familiar with the controls of whatever program you are using, and you will be able to understand better what you are trying to do to 'an outfit' or 'a top' or whatever it is you want to recolor or change..
That said, I have a question...How much can I play with an Alpha or mesh? Are there limits? That is, can I screw up my game or say an original Maxis mesh, so that I won't be able to play?
I just don't want to get overconfident!

Thanks to Everyone who puts a tutorial online! I know you have done a lot of work trying to help people understand the 'How tos'! Hopefully someday maybe I will learn enough to be able to write my own tutorial!! And true thanks to YOU too Tiggery!! All these questions must bog you down an awful lot!
~DidaDragonfly~
#245
30th Jul 2007 at 6:53 AM
30th Jul 2007 at 6:53 AM
didadragonfly
You can't break anything by messing with the alpha graphic and using bodyshop. You might not LIKE what you create, lol, but nothing will break.
If you learn how to make meshes - you can overwrite game meshes, make meshes that explode, and fun stuff like that. That's over in the bodyshop meshing area, if you are up for such abuse -- I'd say being a really good skinner (good with the textures) is important. It also means you have a bit of an understanding of your goals when you get to wanting to change a mesh, and that you can put pretty stuff on your mesh when you're done Meshing is fussy work. Complicated. Takes an investment of time, just like it takes time to get really good with your graphics program and then get the hang of how to do things to make your clothing look more real.
"Undertake something that is difficult; it will do you good. Unless you try to do something beyond what you have already mastered, you will never grow." - Ronald E. Osborn
You can't break anything by messing with the alpha graphic and using bodyshop. You might not LIKE what you create, lol, but nothing will break.
If you learn how to make meshes - you can overwrite game meshes, make meshes that explode, and fun stuff like that. That's over in the bodyshop meshing area, if you are up for such abuse -- I'd say being a really good skinner (good with the textures) is important. It also means you have a bit of an understanding of your goals when you get to wanting to change a mesh, and that you can put pretty stuff on your mesh when you're done
Meshing is fussy work. Complicated. Takes an investment of time, just like it takes time to get really good with your graphics program and then get the hang of how to do things to make your clothing look more real.
"Undertake something that is difficult; it will do you good. Unless you try to do something beyond what you have already mastered, you will never grow." - Ronald E. Osborn
Please do NOT PM me with requests, creation questions, or game help questions. Click for help:
Game Help | Create | Content List | Where Can I Find?
Game Help | Create | Content List | Where Can I Find?
#246
11th Aug 2007 at 9:58 PM
11th Aug 2007 at 9:58 PM
Ok I've got it kind of figured out and I came up with  that..my next question is how can i display my outfits like they do on other sites (poses, zoomed in for deatail)
that..my next question is how can i display my outfits like they do on other sites (poses, zoomed in for deatail)
#247
17th Aug 2007 at 11:10 PM
17th Aug 2007 at 11:10 PM
Posts: 38
I'm getting a grey shadow/outline just above the neckline of my dress. I think that it may be caused by either the mesh I used for this tutorial or the bump map. However, I haven't been able to resolve this problem.
I tried to use a mesh that was as close to the shape of the picture as I could find. Any suggestions?
I tried to use a mesh that was as close to the shape of the picture as I could find. Any suggestions?
#248
21st Aug 2007 at 8:10 AM
21st Aug 2007 at 8:10 AM
Posts: 16
Thanks: 93 in 2 Posts
This tutorial is very helpful  I will be using it!! thanks!
#249
23rd Aug 2007 at 4:54 AM
23rd Aug 2007 at 4:54 AM
Dabih - edit the 'bumpmap' graphic if you have one, and make it all solid light gray. That's the easy way to determine if it's the bumpmap causing the problem.
"Undertake something that is difficult; it will do you good. Unless you try to do something beyond what you have already mastered, you will never grow." - Ronald E. Osborn
"Undertake something that is difficult; it will do you good. Unless you try to do something beyond what you have already mastered, you will never grow." - Ronald E. Osborn
Please do NOT PM me with requests, creation questions, or game help questions. Click for help:
Game Help | Create | Content List | Where Can I Find?
Game Help | Create | Content List | Where Can I Find?
Test Subject
#250
23rd Aug 2007 at 8:38 PM
Last edited by minutestomidnight387 : 24th Aug 2007 at 2:23 AM.
23rd Aug 2007 at 8:38 PM
Last edited by minutestomidnight387 : 24th Aug 2007 at 2:23 AM.
Posts: 2
Awesome Tutorial, it made me want to make my own clothes!
So I tried, but I'm working on it, and nothing happens when I do everything you stated. The original doesn't change when I try to preview or at any time at all. Please Help
So I tried, but I'm working on it, and nothing happens when I do everything you stated. The original doesn't change when I try to preview or at any time at all.
Please Help
Who Posted
|
|