 Sign in to Mod The Sims
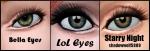
 Yet Even More Default Eye Replacements.
 Yet Even More Default Eye Replacements.


Chin_Eyes_ContactsCAS.jpg - width=628 height=333
Examples of non-default Chin_Eyes in CAS.
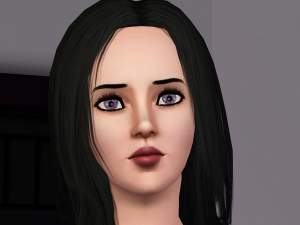
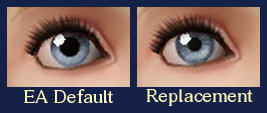
Chin_Eyes_DefaultCAS.jpg - width=627 height=534
Examples of default Chin_Eyes in CAS.
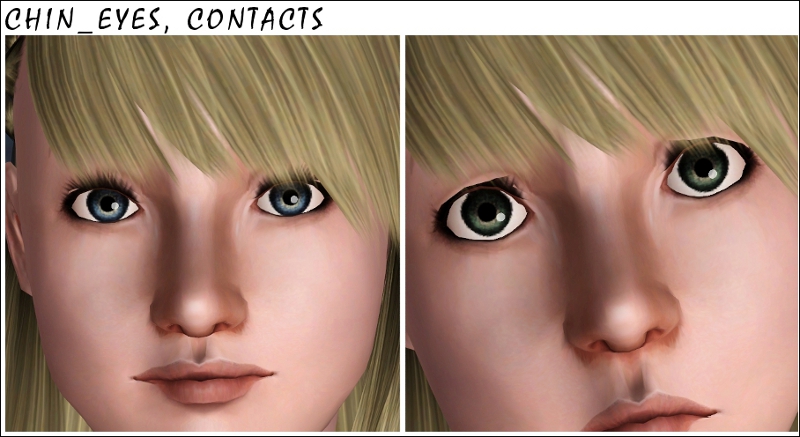
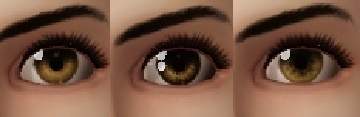
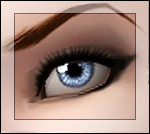
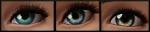
CHINCONTACTS.jpg - width=800 height=437
Examples of non-default Chin_Eyes in game.
CHINDEFAULTS.jpg - width=800 height=434
Examples of default Chin_Eyes in game.
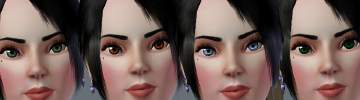
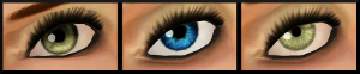
SKYE_EYES_CONTACTSCAS.jpg - width=642 height=284
Examples of non-default Skye_Eyes in CAS.
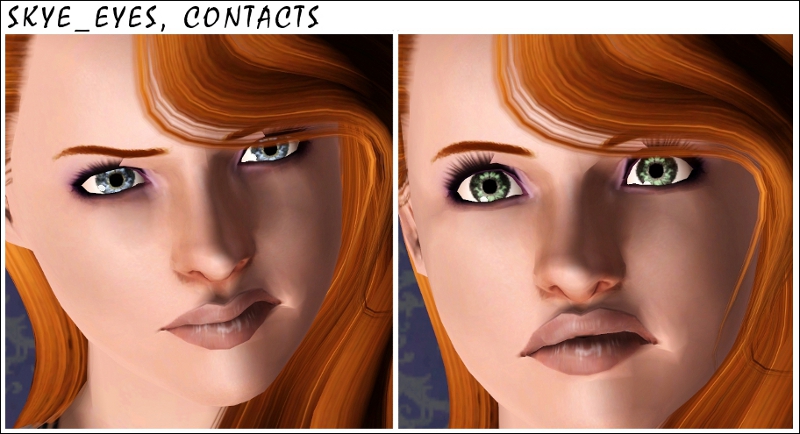
SKYECONTACTS.jpg - width=800 height=434
Examples of non-default Skye_Eyes in game.
SKYE_EYES_DEFAULTSCAS.jpg - width=638 height=465
Examples of default Skye_Eyes in CAS.
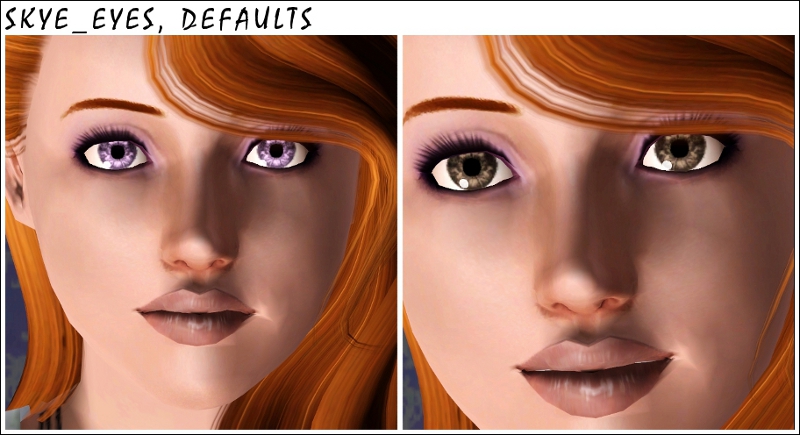
SKYEDEFAULT.jpg - width=800 height=435
Examples of default Skye_Eyes in game.
To keep up with my horrific naming techniques, these also have some... odd names. But you can't say they're not unique, right?
The first set is called Chin_Eyes, because I like chinchillas. Yes.
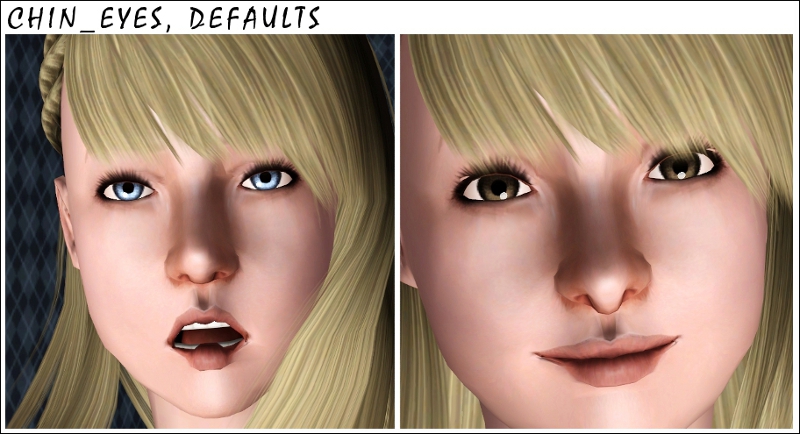
The contact version is under the costume makeup section and should be usable for all ages and both genders, if I didn't screw something up. There are three color channels, in the form of rings around the pupil, around the middle of the eye, then around the outer edge. However, due to the shading of the texture around the outer edge, that channel does not recolor well. It is slightly noticeable, but it doesn't do too much.
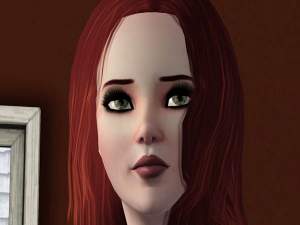
The second set is called Skye_Eyes, because my bird is named Sky and the first eyes I tested these on were a sky blue color. Yeah.
Honestly, I didn't like these too much when I first saw them (I prefer simpler eyes like the Chin_Eyes), but each time I see them, they continue to grow on me. I included them in case others would like them as well.
As for the contact version, they are also found in the costume makeup section and should also be usable by all ages and both genders as long as I didn't mess it up later on. There are three color channels, also in the form of rings around the eye, and there isn't as much of an issue with the outer ring channel as there isn't as much shading around it.
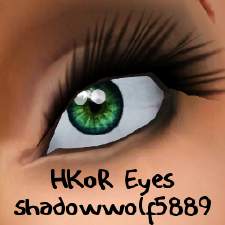
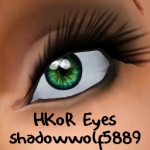
The contact versions of both Chin_Eyes and Skye_Eyes have custom thumbnails. The username on the thumbnail and on the filenames is "soledestiny". That's the name I prefer to go by, even though it's not my name here (yet anyway... if my username change request is accepted). Plus shadowwolf5889 didn't fit too well on the thumbnail. Sorry if that causes any confusion.
I'm pretty sure I checked everything thoroughly to make sure things were set up right. This is the first time I've really done and submitted contacts, so hopefully they are all right. Please let me know if there's a problem and I'll try to fix it.
Additional Credits:
Both models use: 234jiao's default skin.
As for the redheaded model: Hair by TumTum Simiolino, Eyeshadow by Lady Frontbum, Eyeliner by Papercat, Lipstick by The Sims World.
As for the blonde model: Hair by Anubis, Eyeshadow by Lady Frontbum, Eyeliner and lipstick by Papercat.
|
Skye_Eyes_Contacts_by_soledestiny.rar
| Non-default version of Skye_Eyes.
Download
Uploaded: 8th Sep 2010, 102.1 KB.
3,564 downloads.
|
||||||||
|
Chin_Eyes_Contacts_by_soledestiny.rar
| Non-default version of Chin_Eyes.
Download
Uploaded: 8th Sep 2010, 93.2 KB.
3,936 downloads.
|
||||||||
|
Skye_Eyes_Defaults_by_soledestiny.rar
| Default version of Skye_Eyes.
Download
Uploaded: 8th Sep 2010, 6.0 KB.
3,614 downloads.
|
||||||||
|
Chin_Eyes_Defaults_by_soledestiny.rar
| Default version of Chin_Eyes.
Download
Uploaded: 8th Sep 2010, 5.7 KB.
5,502 downloads.
|
||||||||
| For a detailed look at individual files, see the Information tab. | ||||||||
Install Instructions
1. Click the download button, or the filename, to download the file to your computer.
2. Extract the zip, rar, or 7z file. Now you will have either a .package or a .sims3pack file.
For Package files:
1. Cut and paste the file into your Documents\Electronic Arts\The Sims 3\Mods\Packages folder. If you do not already have this folder, you should read the full guide to Package files first: Sims 3:Installing Package Fileswiki, so you can make sure your game is fully patched and you have the correct Resource.cfg file.
2. Run the game, and find your content where the creator said it would be (build mode, buy mode, Create-a-Sim, etc.).
For Sims3Pack files:
1. Cut and paste it into your Documents\Electronic Arts\The Sims 3\Downloads folder. If you do not have this folder yet, it is recommended that you open the game and then close it again so that this folder will be automatically created. Then you can place the .sims3pack into your Downloads folder.
2. Load the game's Launcher, and click on the Downloads tab. Find the item in the list and tick the box beside it. Then press the Install button below the list.
3. Wait for the installer to load, and it will install the content to the game. You will get a message letting you know when it's done.
4. Run the game, and find your content where the creator said it would be (build mode, buy mode, Create-a-Sim, etc.).
Extracting from RAR, ZIP, or 7z: You will need a special program for this. For Windows, we recommend 7-Zip and for Mac OSX, we recommend Keka. Both are free and safe to use.
Need more help?
If you need more info, see:
- For package files: Sims 3:Installing Package Fileswiki
- For Sims3pack files: Game Help:Installing TS3 Packswiki
Loading comments, please wait...
Uploaded: 8th Sep 2010 at 5:35 AM
#eyes
-
-
Default Eye Replacements: GlistenEyes
by sprinkz 3rd Jul 2009 at 8:04pm
-
Default Eye Replacements-Vivid Eyes
by JillianWong 7th Jul 2009 at 5:06pm
-
BrightEyes Default Eye Texture Replacements
by Miniie 9th Jul 2009 at 8:01am
-
shadowwolf5889's Default Eye Replacements
by shadowwolf5889 12th Jul 2009 at 7:41pm
-
Default Eye Replacements-Vibrant Eyes
by JillianWong 15th Jul 2009 at 10:40am
-
Even More Default Eye Replacements [Updated 8/12/10]
by shadowwolf5889 updated 22nd Jan 2010 at 3:15am
-
Luminous eyes - Default Replacements
by -Shady- 11th Jan 2010 at 2:15pm
-
More or Less, More Default Eyes and Contacts
by shadowwolf5889 31st Mar 2011 at 11:49am
-
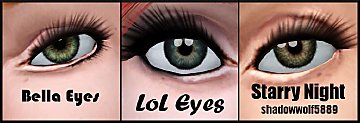
Bella, LoL, and Starry Night Eyes: Defaults and Contacts
by shadowwolf5889 3rd Jul 2012 at 11:33am


-

shadowwolf5889's Default Eye Replacements
by shadowwolf5889 12th Jul 2009 at 7:41pm
This is my first attempt at making any Sims item for any game. more...
-
Bella, LoL, and Starry Night Eyes: Defaults and Contacts
by shadowwolf5889 3rd Jul 2012 at 11:33am
Three sets of eyes, with default and contact versions of each eye. more...
-
More or Less, More Default Eyes and Contacts
by shadowwolf5889 31st Mar 2011 at 11:49am
Three default eyes, with two contact versions of each eye as well. more...
-
Hopefully Kind of Realistic Eyes: Defaults & Contacts (updated)
by shadowwolf5889 updated 18th Jul 2011 at 11:23pm
Default and non-default eyes that are hopefully kind of realistic... more...
-
Even More Default Eye Replacements [Updated 8/12/10]
by shadowwolf5889 updated 22nd Jan 2010 at 3:15am
UPDATED: I added a version of the Sparkle and Ima eyes with no yellow rings around them. more...

About Me
Please don't edit my creations without my permission, or upload them anywhere else. I doubt you would want to in the first place :P
Sorry for any late replies or no replies to something, if anyone tries to reach me here... I don't come to MTS all that often anymore.
You can also see some other TS3 creations I've made (a few eyes and some lipsticks) by clicking on my homepage link. I might eventually post those things here on MTS once I quit being lazy.